Step-by-Step Guide to Setting Up Snort as Your HomeLab IDS with wazuh (SIEM) Integration in 2024

IDS/IPS systems - Intrusion Detection / Prevention Systems - are part of any well-established organizational network. If security is a priority you need an IDS/IPS sooner rather than later.
Commonly used open source solutions for IDS are snort and suricata, today we will look at snort and setting it up from scratch in your home lab.
Cool, but how does and IDS work actually?
Overview - What is an IDS/IPS?
The Intrusion Detection System analyzes all traffic either via port mirroring - essentially, cloning all packets and analyzing them - or acting like a gateway, which is similar to airport security, everyone needs to pass before they go in/out.

The software then compares the data inside the packets to predefined rules - these can range from regular expressions to more sophisticated integrations - essentially they all do the same though.
They compare data to known malicious indicators.
The plan
Today we will do the following things:
install snort on debian virtual machine
configure snort
install wazuh agent
forward snort logs to wazuh
optional - download and install rules from emerging threats
Are you ready? Ok, without further ado - here we go.
1 - Install snort on debian
I assume in this post that you have a virtual machine with debian on it, should you want support in how to set this up check out this post:
https://maikroservice.com/setting-up-wazuh-as-your-siem-on-debian-12-proxmox-a-step-by-step-guide
Start the Virtual Machine - Once the VM is booted the installation process for snort is a single command inside your terminal:
sudo apt-get install snort -y

unable to locate package snort you need to add the ubuntu repository to your apt lists.Adding the ubuntu repository to your apt lists
If you see this:

Fear not - we have a solution. Recently, debian appears to have removed snort from it’s repositories - so now we need to add a new repository manually to install snort (another option would be to install from source, but that is more brain-intensive and not part of this post).
The first file you need to open is /etc/apt/sources.list. This file contains all the repositories that apt is able to query for packages. If you try to install one, which is not available, apt tells you that it cannot find the package.
AHHH, so that is what happened here?!
Exactly. Open the sources file e.g. with vim , nano or your favorite text editor (make sure you are using sudo rights or are logged in as root)

and add the following line to the bottom:
deb http://de.archive.ubuntu.com/ubuntu/ jammy main restricted universe multiverse
Afterwards, your sources.list should look something like this:

Great, close the file (make sure to save it!) and update your local apt cache by running sudo apt-get update
Umm… this fails?!

Aha! Apparently, it’s not as simple as adding this one line, we also need to add a public key so that our local system can verify the integrity of the remote apt cache.
871920D1991BC93C), make sure you copy and paste the value you see in your terminal for the next commandLucky for us this is a single command where you need to add your public key identifier:
apt-key adv --keyserver keyserver.ubuntu.com --recv-keys <the_public_key_identifier_you_copied>

Wonderful, now try to update your apt cache again with: sudo apt-get update.

BINGOOOOO. That worked, and now you can install snort with:
sudo apt-get install snort -y
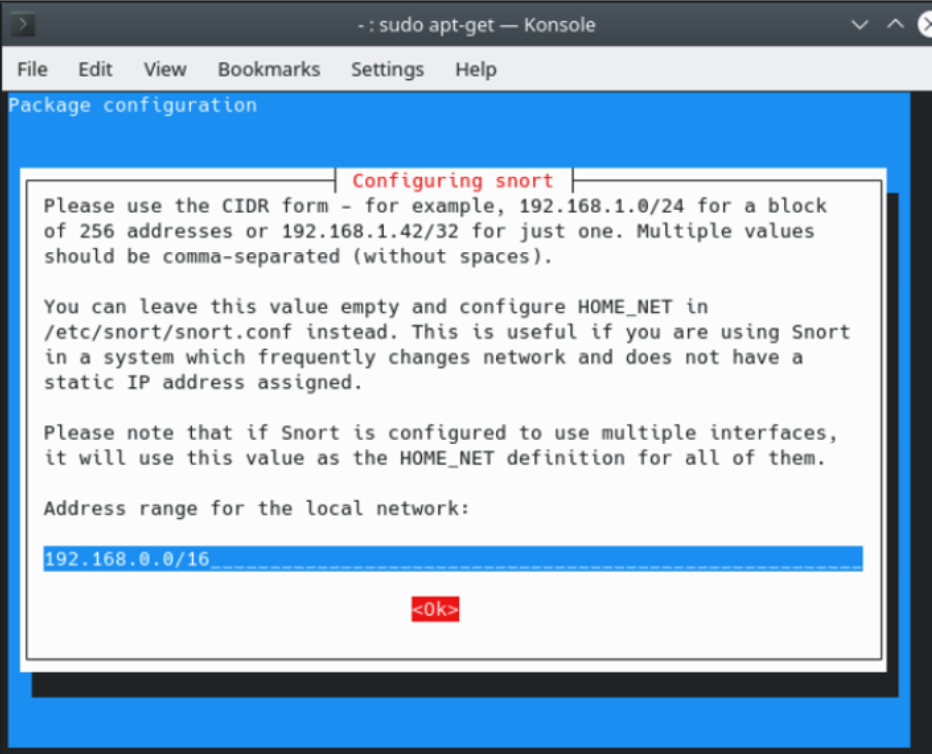
Once the prerequesites are installed snort might ask you to configure the starting setup properly - the first thing you have to do is enter your local network that needs scanning.
You need to use the CIDR notation, if you are unsure what that is ask your favorite search engine or GPT buddy for support with subnetting - or leave me a comment and I will try to answer as many as possible!
Once that is done make sure to check if snort was installed properly by running snort -v - if you receive bash: snort: command not found make sure you are in a privileged context (e.g. sudo snort -v or su - && snort -v).
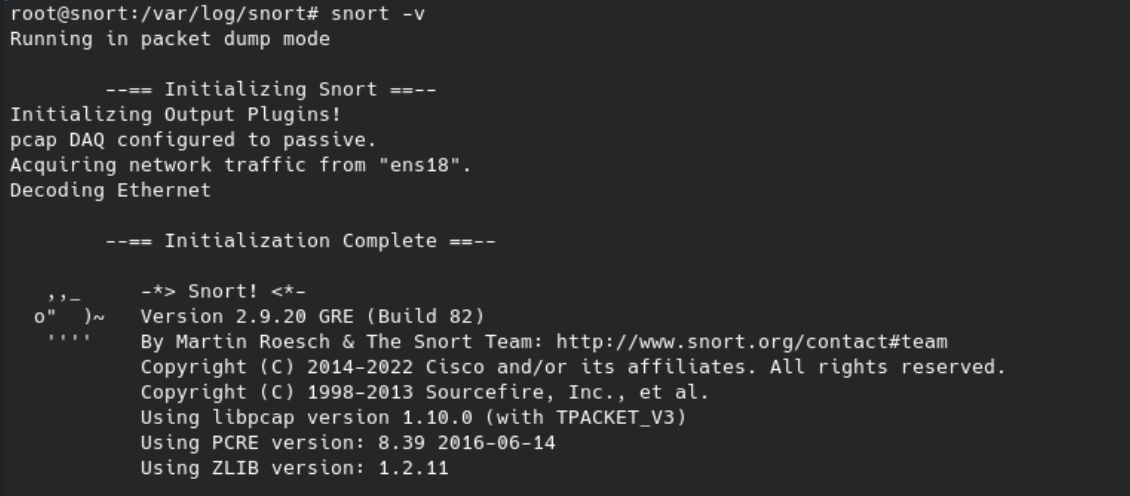
Great, that was the installation process of snort - you did very well 🤘.
Now we need some configuration to make sure snort works properly.
2 - snort configuration
By default snort (2.9.xx) has the following interesting locations - /var/log/snort and /etc/snort.
The former holds all the logs that snort produces, the second one holds the configuration file - snort.conf we are interested in.
Open the /etc/snort/snort.conf file with your favorite text editor e.g. nano /etc/snort/snort.conf.
Now scroll down to Step #6 and find the lines below:
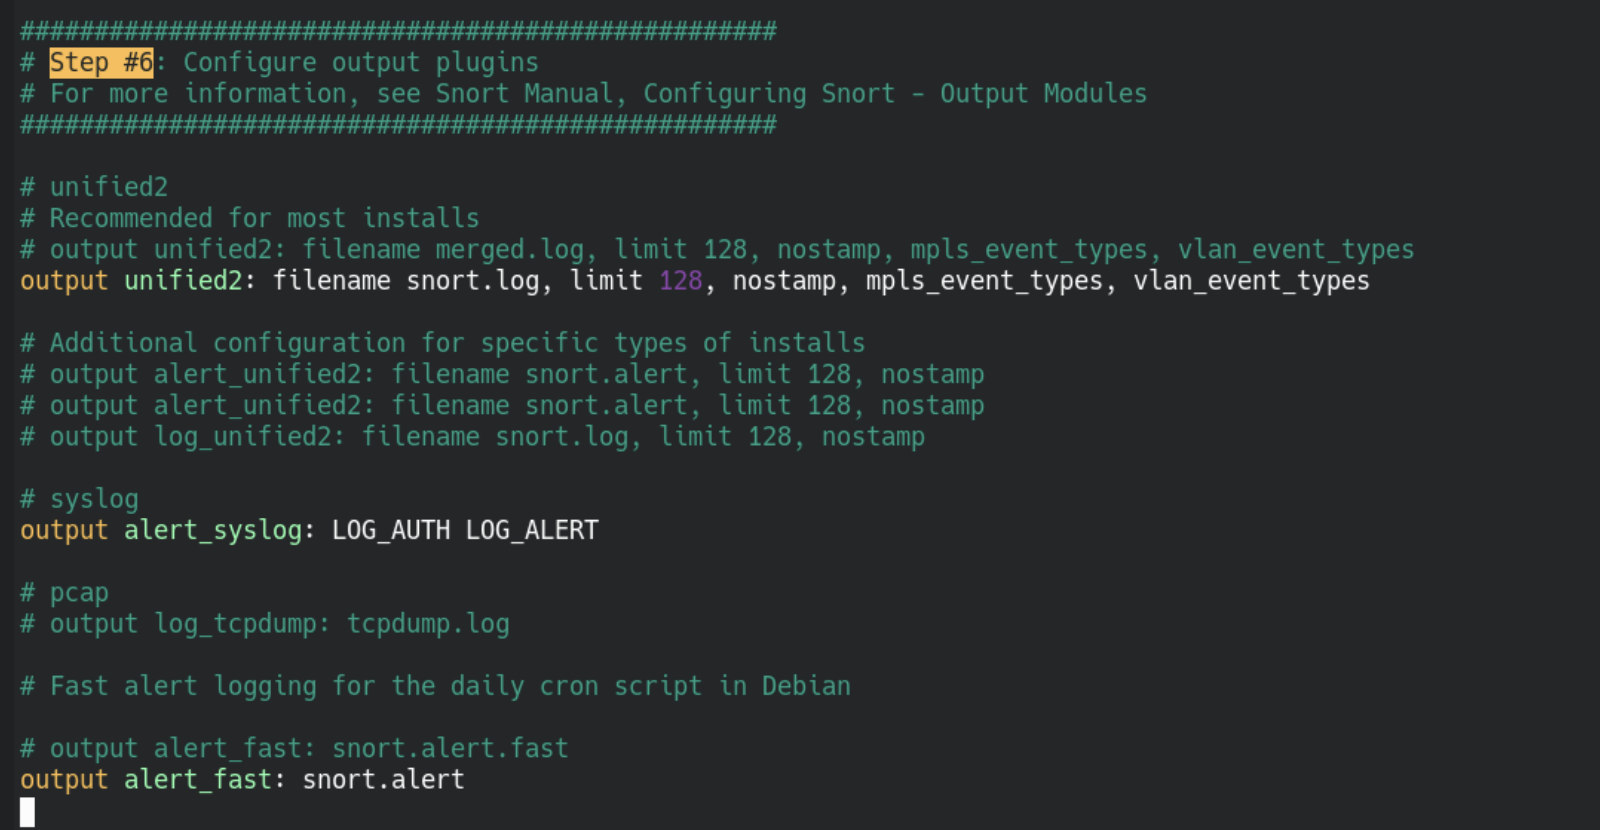
You need to change the following line(s) and save after:
output alert_fast: snort.alert.fast

# change it to
output alert_fast: snort.alert

# optional but suggested, remove the # before
# the #output alert_syslog: LOT_AUTH LOG_ALERT line
Great, we adapted the configuration file, but umm...
Why?
What does that change do?
Great questions - The line alert_syslog: LOG_AUTH LOG_ALERT tells snort to log stuff related to authentication and alerts via syslog.
Cool but umm... What's syslog?
/var/log/syslog on ubuntu/debian derivates and in /var/log/messages for CentOS derivates like amazon linux.Why is this important?
Your Security Information and Event Management System (SIEM) has integrations for syslog so events that are inside the syslog will by default be connected to your SIEM already - win <> win situation!
Ok cool, but what about the other change we made to the configuration file?
That one took me a while to find/figure out - By default snort stores log data in pcap format - this is a binary format that e.g. Wireshark uses to store network traffic information.
Great for the computer, not so great for our SIEM - because it cannot read the format 😅
What we did with output alert_fast: snort.alert is the following:
We use the alert_fast module which stores data in readable text (good for us + SIEM) and tell it to use the snort.alert data stream (all the alert data) for logging - documentation (2.6.2): http://manual-snort-org.s3-website-us-east-1.amazonaws.com/node21.html#SECTION00363000000000000000
alert_full which logs everything inside the packet. This option has a large issue though, it is super slow. That means if you have any network with more than 1-2 idle machines you will be in for a rough one, because the conversion is so sloooooooooow. DONT USE THIS IN PRODUCTION!Great, now our snort install is almost ready to throw alerts. The penultimate step is to restart snort.
sudo systemctl restart snort
...and then...
You should be able to see one or two new files inside /var/log/snort called snort.alert.fast and maybe even snort.alert.fast.1 - this is good, it is exactly what we want!
The only thing left is to create a simple test rule. Let's do that next.
Rules and Tests
We will now create a rule that watches for ICMP (ping) traffic and alerts when it finds any. Disclaimer - Since this is a fairly common interaction inside the network you will see a lot of alerts - do not use this in production unless you know what you are doing 🤘
Rules are stored under /etc/snort/rules - the one we are looking for is called local.rules.
We need to add the following line:
alert icmp any any -> any any (msg:"ICMP connection attempt:"; sid:1000010; rev:1;)

This means back to front - we are in revision:1 , the unique id of our rule is 1000010 and the message we will put into the log is ICMP connection attempt: followed by the actual information from the packet.
Save the changes and then we can test the rule.
Testing local rules
Lucky for us snort has an integrated feature that allows us to test newly created/changed rules. We can use:
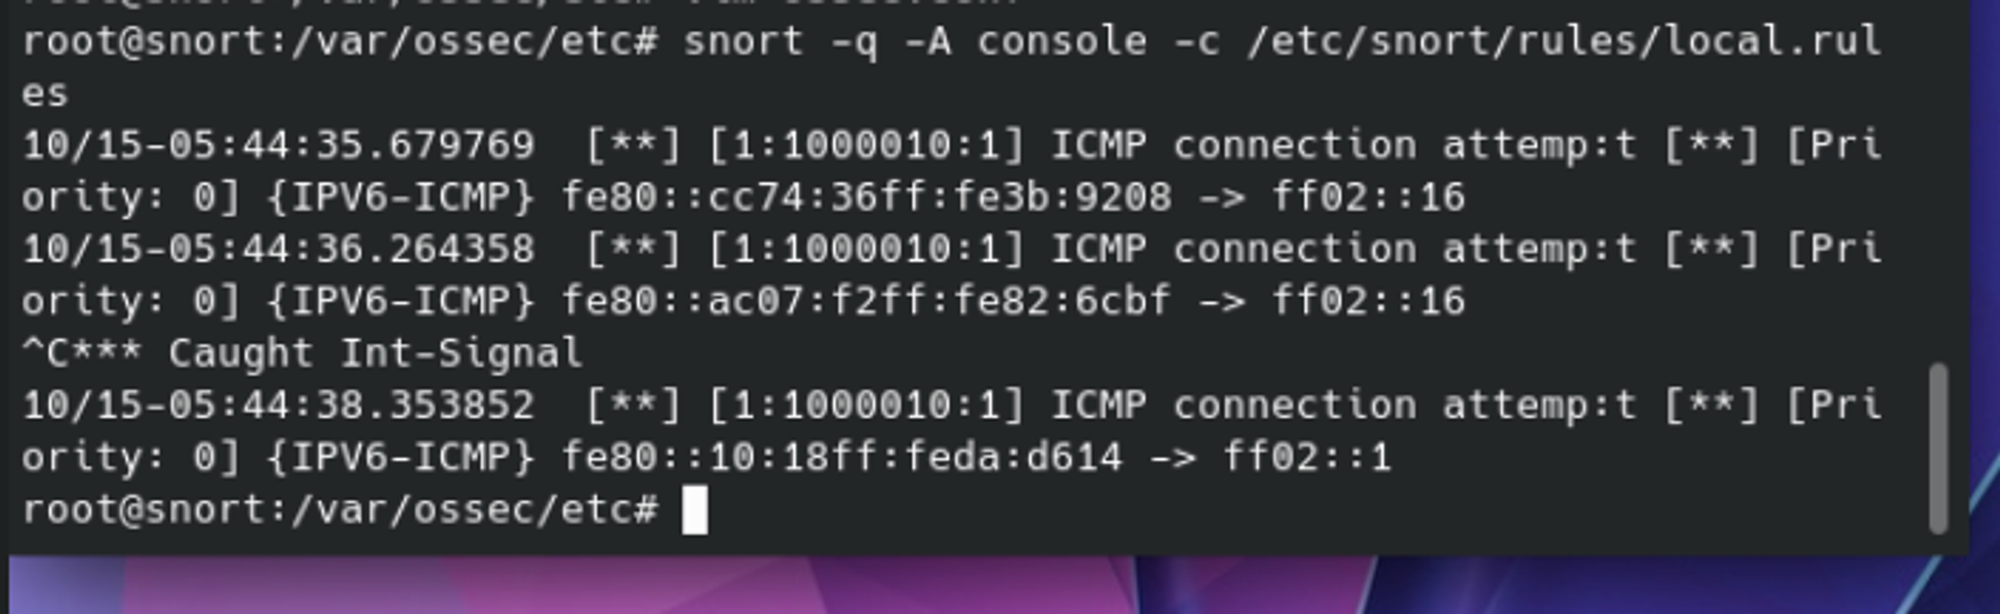
snort -q -A console -c /etc/snort/rules/local.rules
to test the rule we just created - this will run snort and wait for traffic that matches the rule. If you don't see any after a minute or two you can create it yourself.
ping -c 20 <IP_OF_SNORT_VM>
This sends 20 ICMP requests to the snort VM and will trigger the rule 20x 😈 - results might look similar to (without the typo hopefully 😅):
Cool - we have a working rule and a running IDS - now we install and connect our Security Information and Event Management System (SIEM).
wazuh linux agent installation
In order to install the wazuh agent you can follow the exact steps here: https://maikroservice.com/setting-up-wazuh-as-your-siem-on-debian-12-proxmox-a-step-by-step-guide#heading-install-linux-agent
Afterwards, your agent should show up in the wazuh dashboard but it will not have any IDS alerts (yet). Because, this is what we cover in the next step!
snort <> wazuh connection
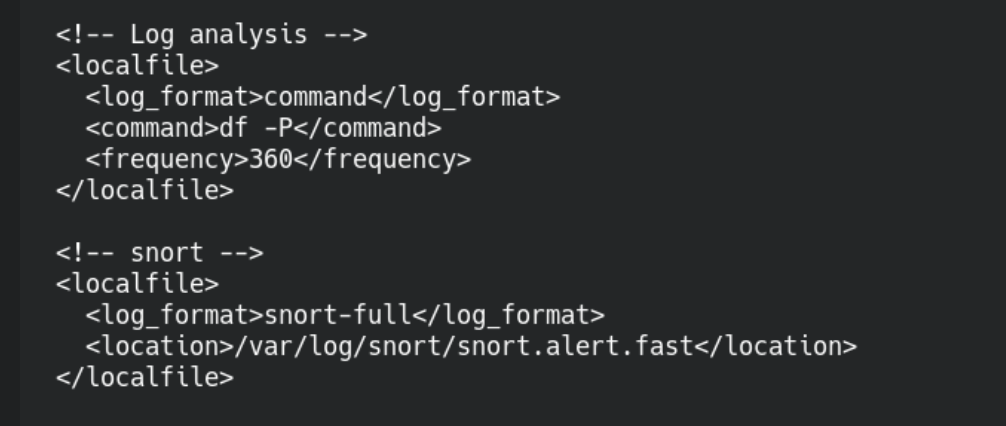
In order to see the alerts in wazuh we need to modify the /var/ossec/etc/ossec.conf file + add a new localfile entry like below and save the file.
<!-- snort -->
<localfile>
  <log_format>snort-full</log_format>
  <location>/var/log/snort/snort.alert.fast</location>
</localfile>
You can place the section right below the <!-- log analysis --> part in the configuration file.
That was it, the connection to wazuh is now setup and we only need to restart the wazuh agent to finish the integration.
sudo systemctl restart wazuh-agent
If this throws no errors you are good to go.
Go check your wazuh dashboard and click on the eye symbol next to the agent at the bottom right.
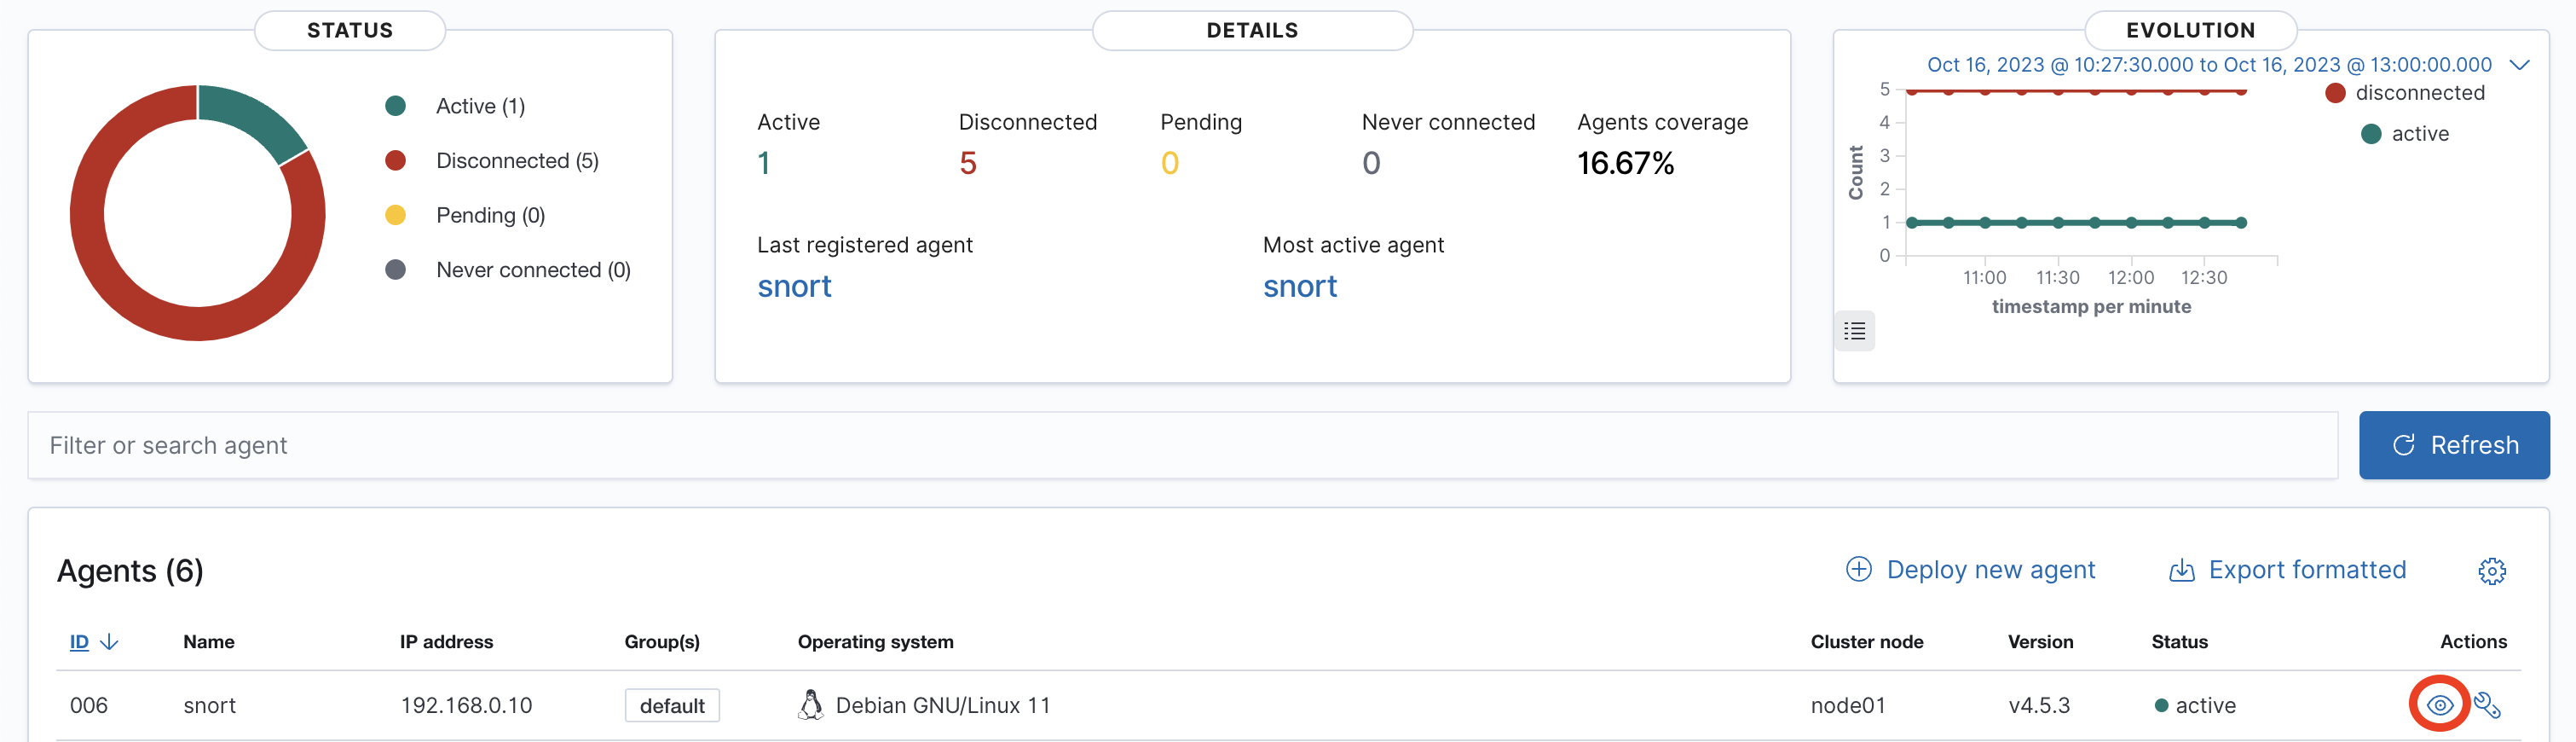
This will bring you to the following overview. This dashboard holds all the events that your agent has collected.
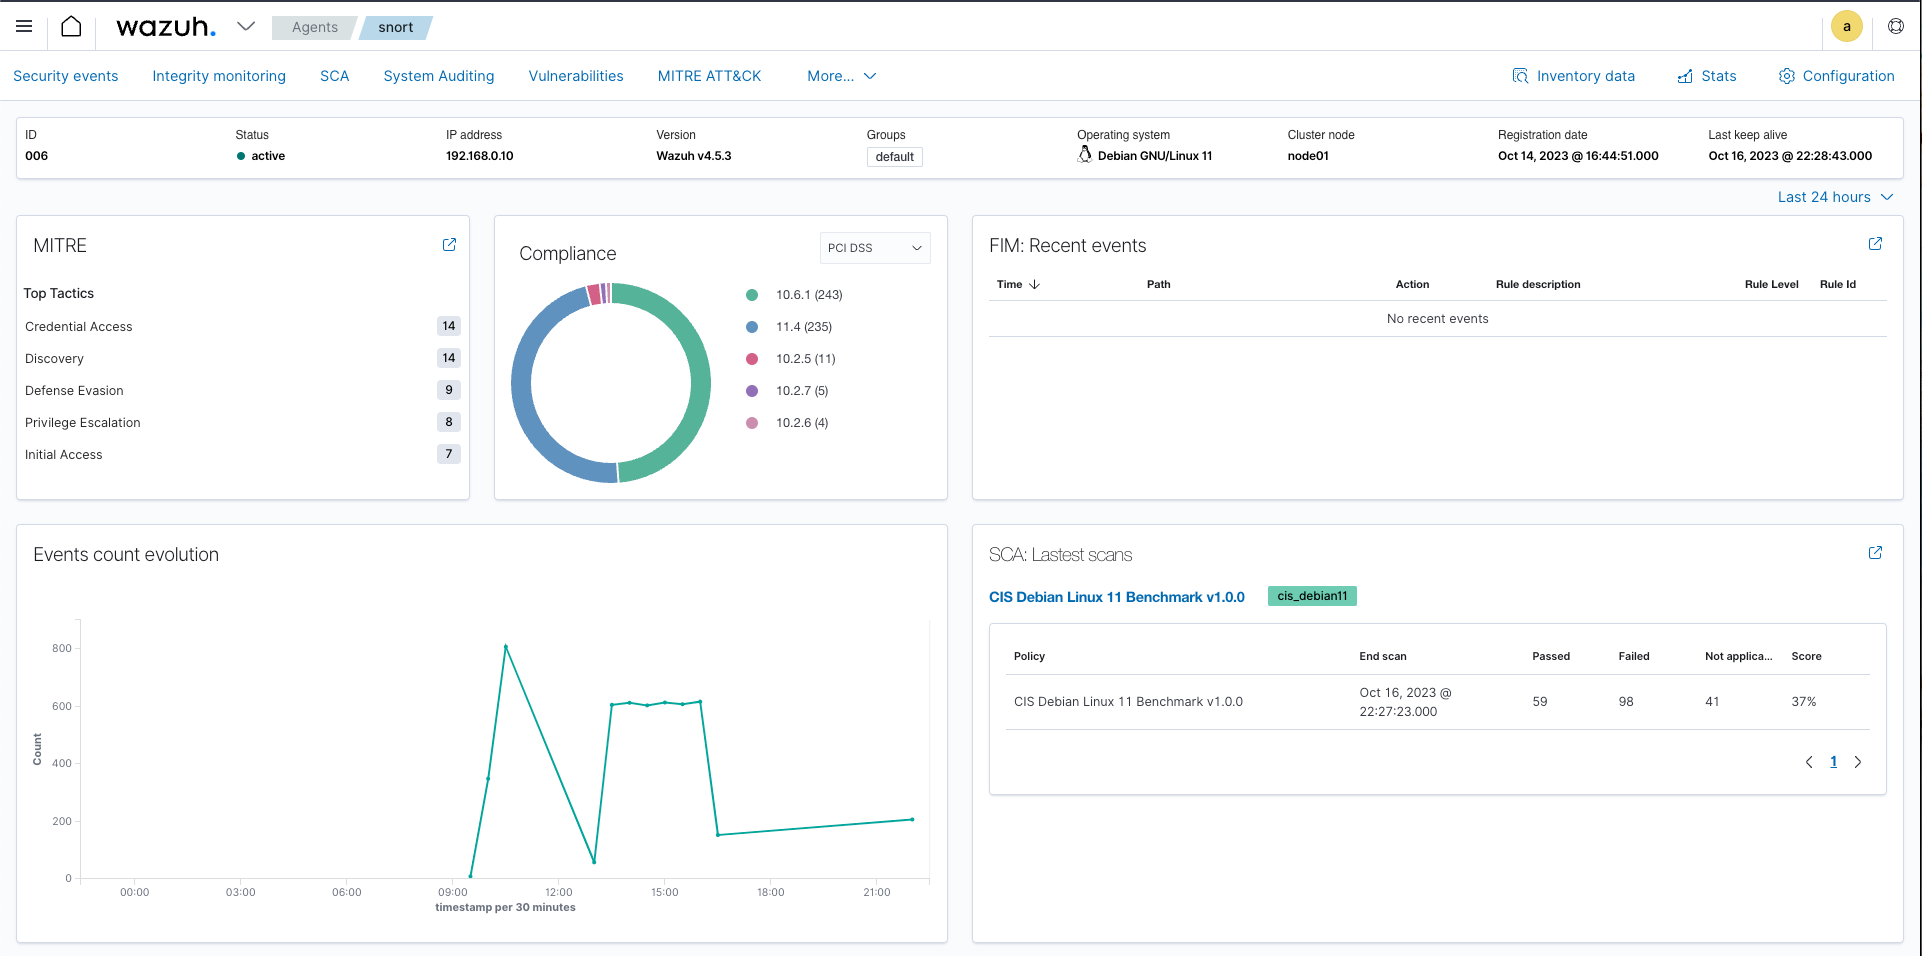
But... where are my IDS events?!
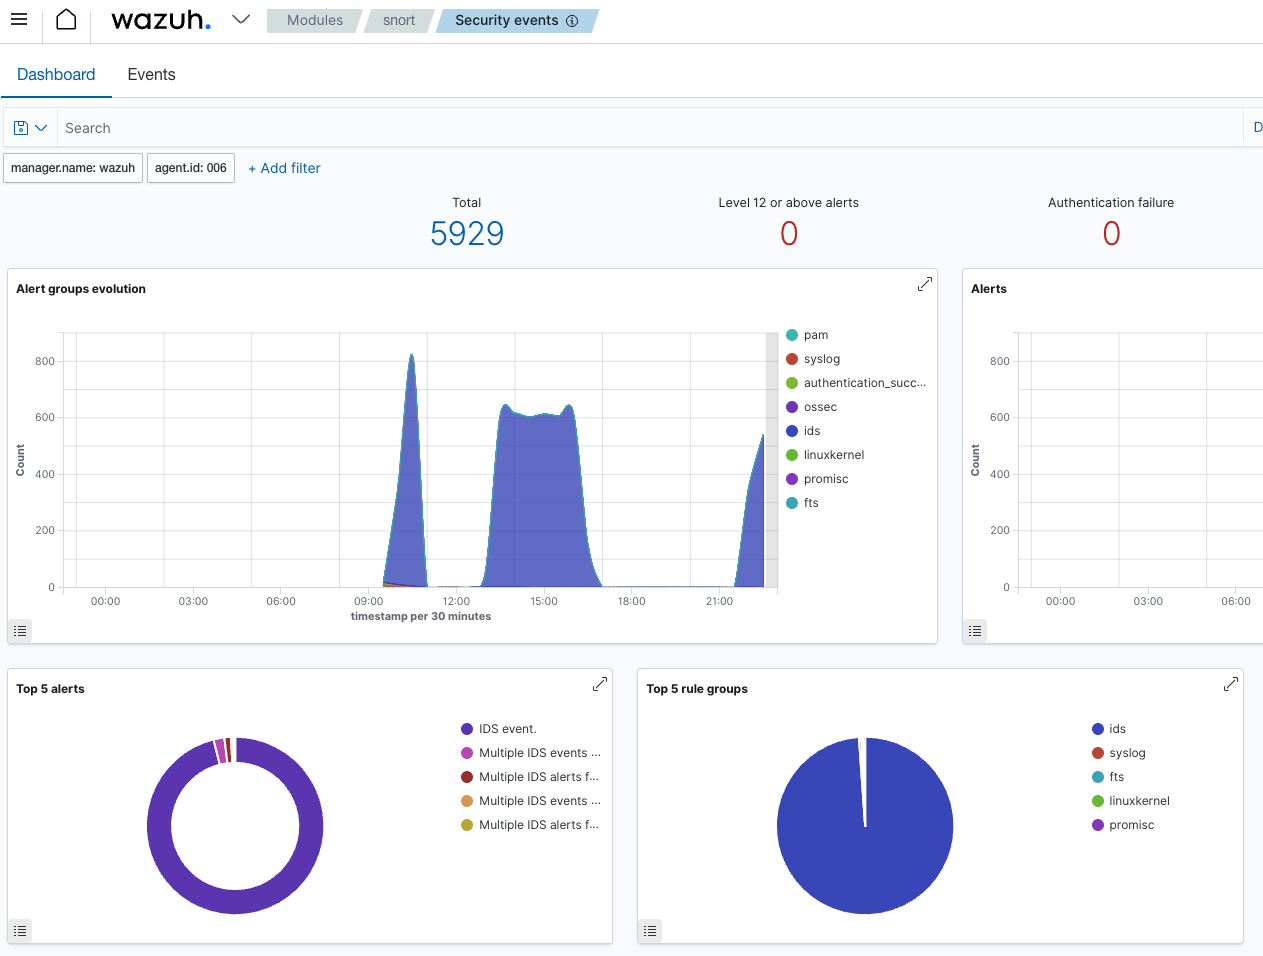
Those are behind the next click - security events in the top left.
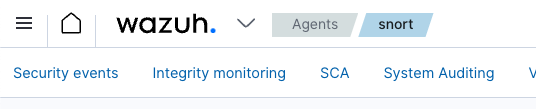
Which brings you to the most important dashboard to look at for now - and if all went well - you see a lot of alerts from ids - your intrusion detection system - aka snort 🥳💜🎉 .
Congratulations you did very well and now have a running IDS in your network.