Step-By-Step Guide to setup Identity Management for wazuh with authentik
Centralized Identity Management when done right gives you and your users the freedom to only remember one password to login to multiple services - single sign-on coupled with Multi-Factor Authentication (MFA) increases security - but... how would you start?
Getting started with Identity Management
The first step could be to define a use-case in your IT environment (home lab or business) where you would want/need a single-sign on solution.
Let us assume you have a Security Information and Event Management System (SIEM) - and let us assume that your favorite system is wazuh (https://wazuh.com). Wazuh has it's own user database/management, and lucky for us wazuh supports external identity providers as well.
Ok, but what does an identity provider to actually?
Identity Provider Overview
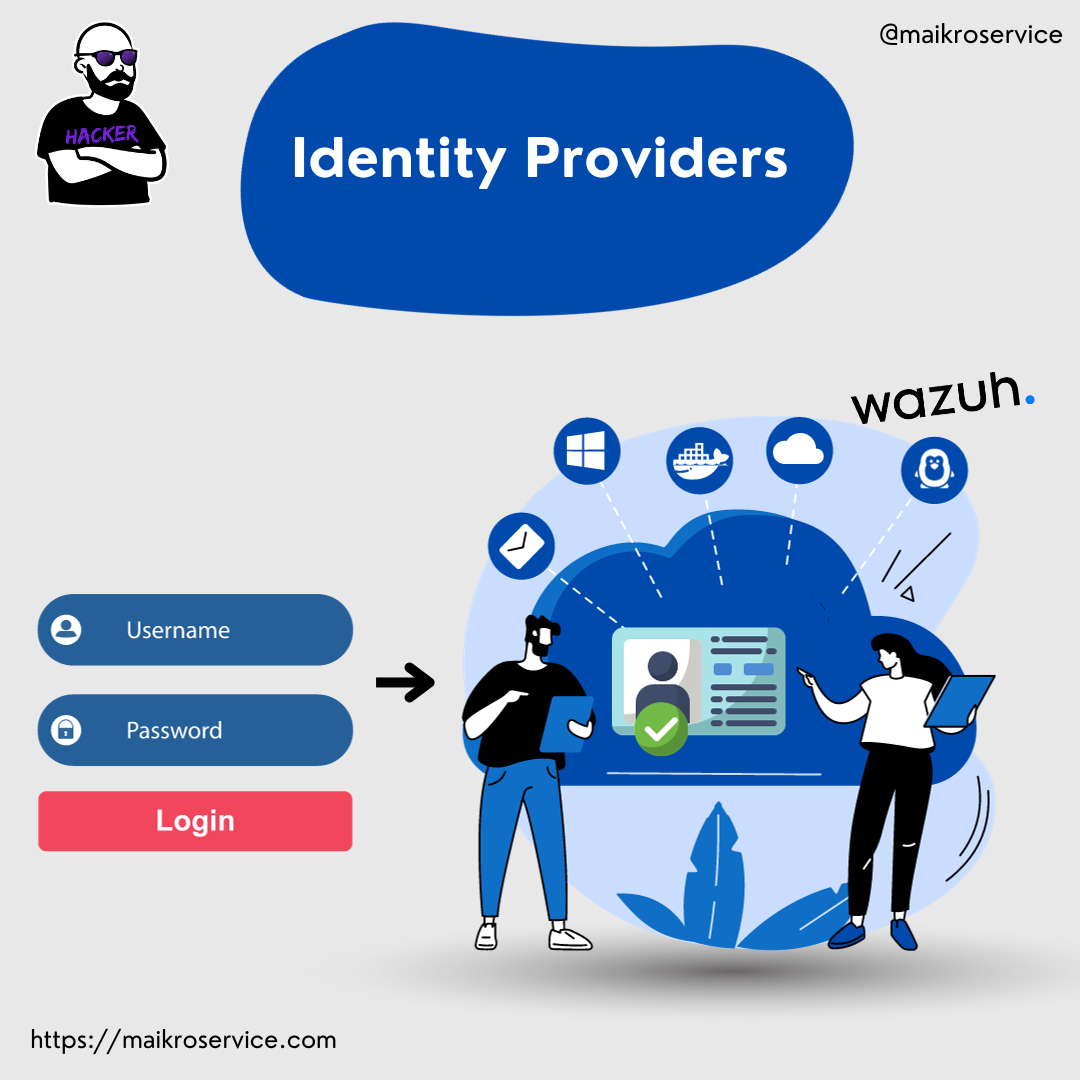
Essentially, an identity provider is a piece of software that sits in the middle between your users and the service they want to use.
It takes username/password and sometimes another factor (one-time passcode, fingerprint/biometric data, key-fobs) and when the correct ones were provided it sends a token (long text) to the connected services.
These tokens allow other connected services to know WHO the user is and IF they are authenticated correctly.
authentik container setup
The easiest way to setup authentik is to use docker compose (https://goauthentik.io/docs/installation/docker-compose) - first you download the docker-compose.yml, then generate secure passwords in an environment file, define the outgoing ports and spin up the containers.
mkdir authentik && cd authentik
wget https://goauthentik.io/docker-compose.yml
wget https://get.docker.com/ -O get-docker.sh
bash get-docker.sh
# optionally - install pwgen to generate passwords
sudo apt-get install -y pwgen
echo "PG_PASS=$(pwgen -s 40 1)" >> .env
echo "AUTHENTIK_SECRET_KEY=$(pwgen -s 50 1)" >> .env
echo "COMPOSE_PORT_HTTP=80" >> .env
echo "COMPOSE_PORT_HTTPS=443" >> .env
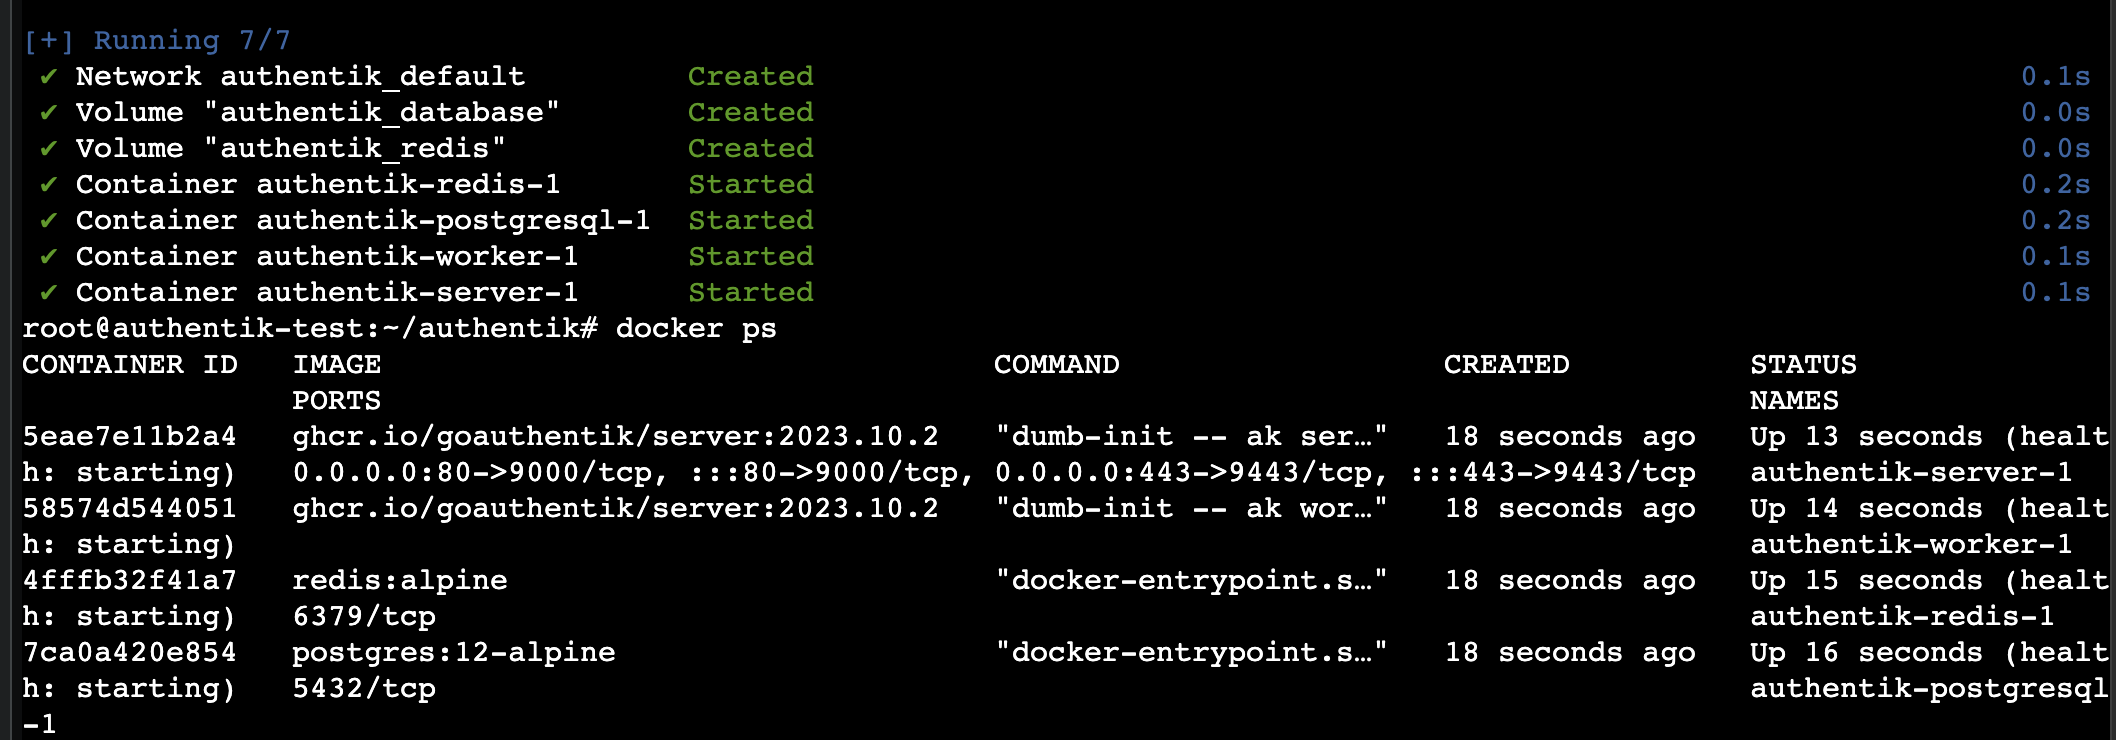
docker compose up -d
You can run docker ps to check if all the containers are running correctly, should look like the screenshot below.
Initial authentik admin account setup
The next step is to create a password for the default administrator account (akadamin) for authentik by visiting:
https://<IP_or_hostname_of_authentik>/if/flow/initial-setup/
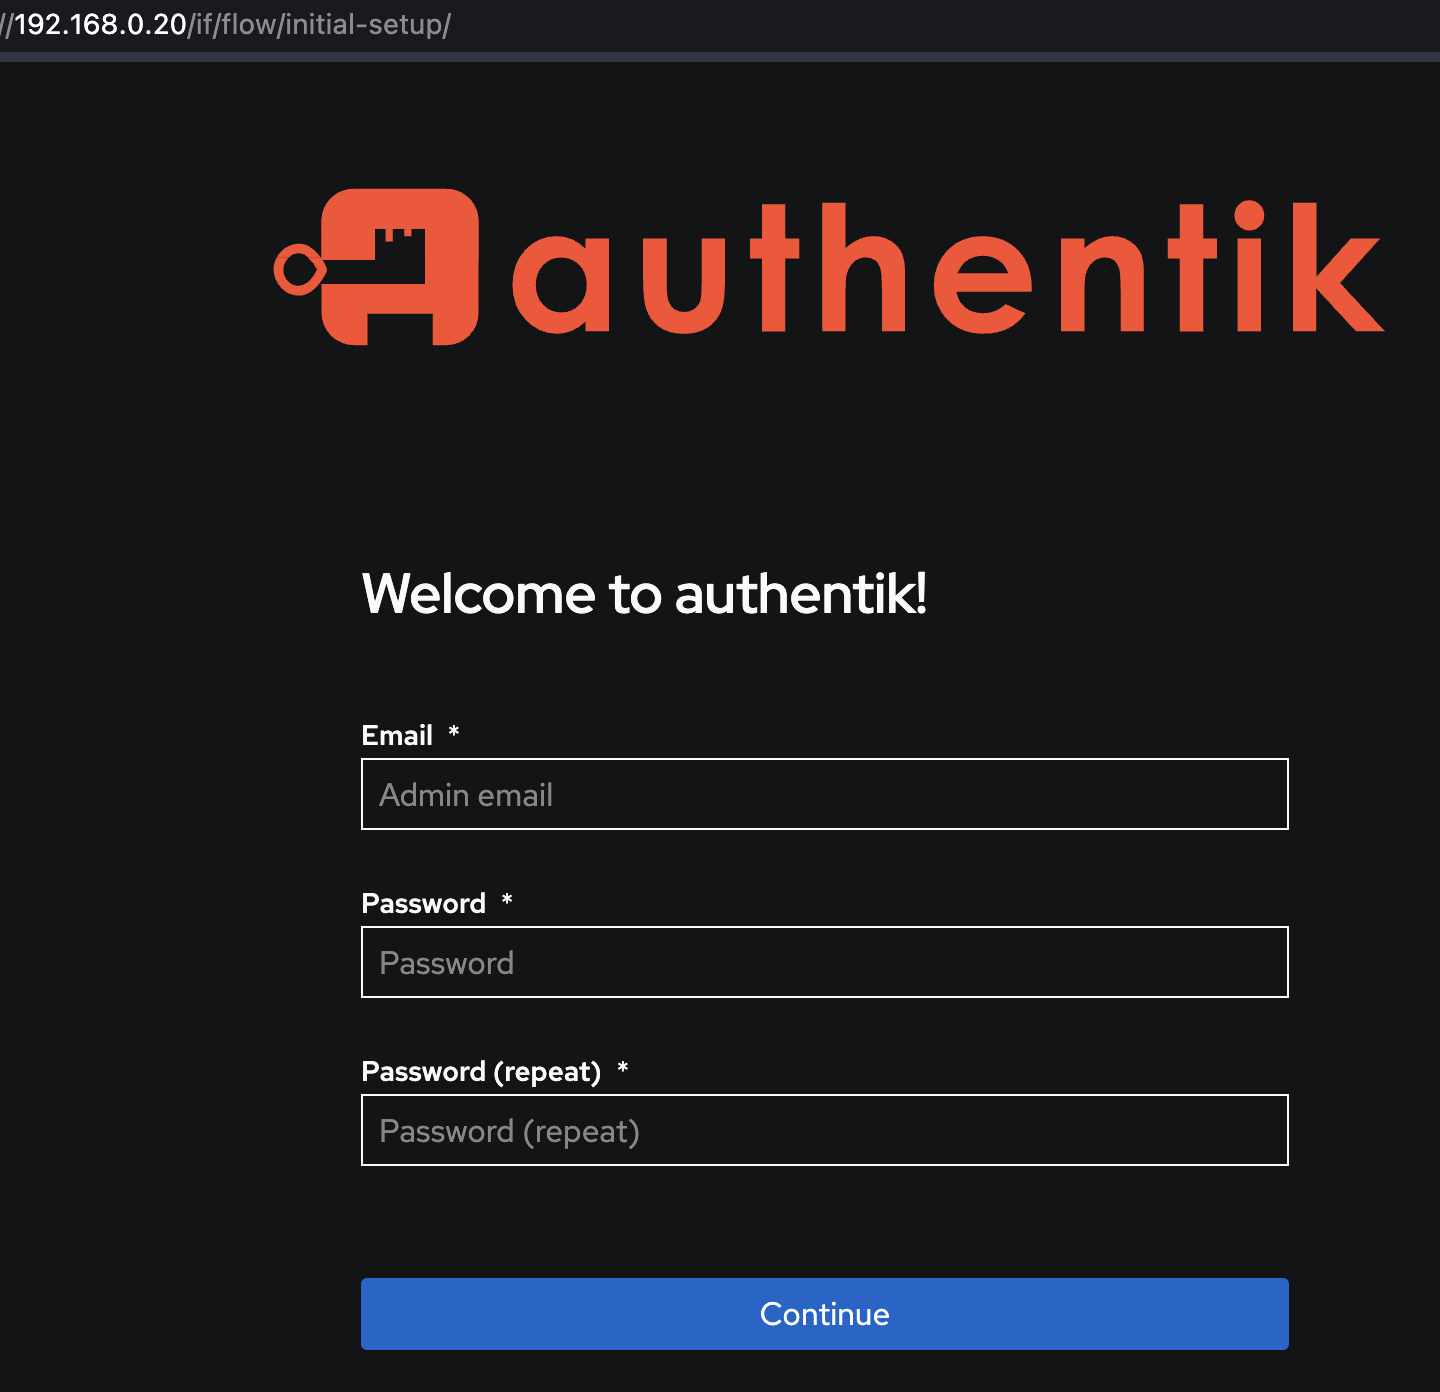
Enter your admin email, and the password twice - press that Continue button and you will be logged in as the administrator.

SAML - Security Assertion Markup Language
We will use SAML to manage the single sign-on (SSO) - it is one of the many standards you will come across among Leightweight Directory Access Protocol (LDAP), Open Authorization (OAuth2).
Our SIEM wazuh can use SAML or LDAP for external auth and since LDAP usually requires a service account with a password (pretty insecure if you ask me) we will use SAML.
SAML Setup in authentik - user / group
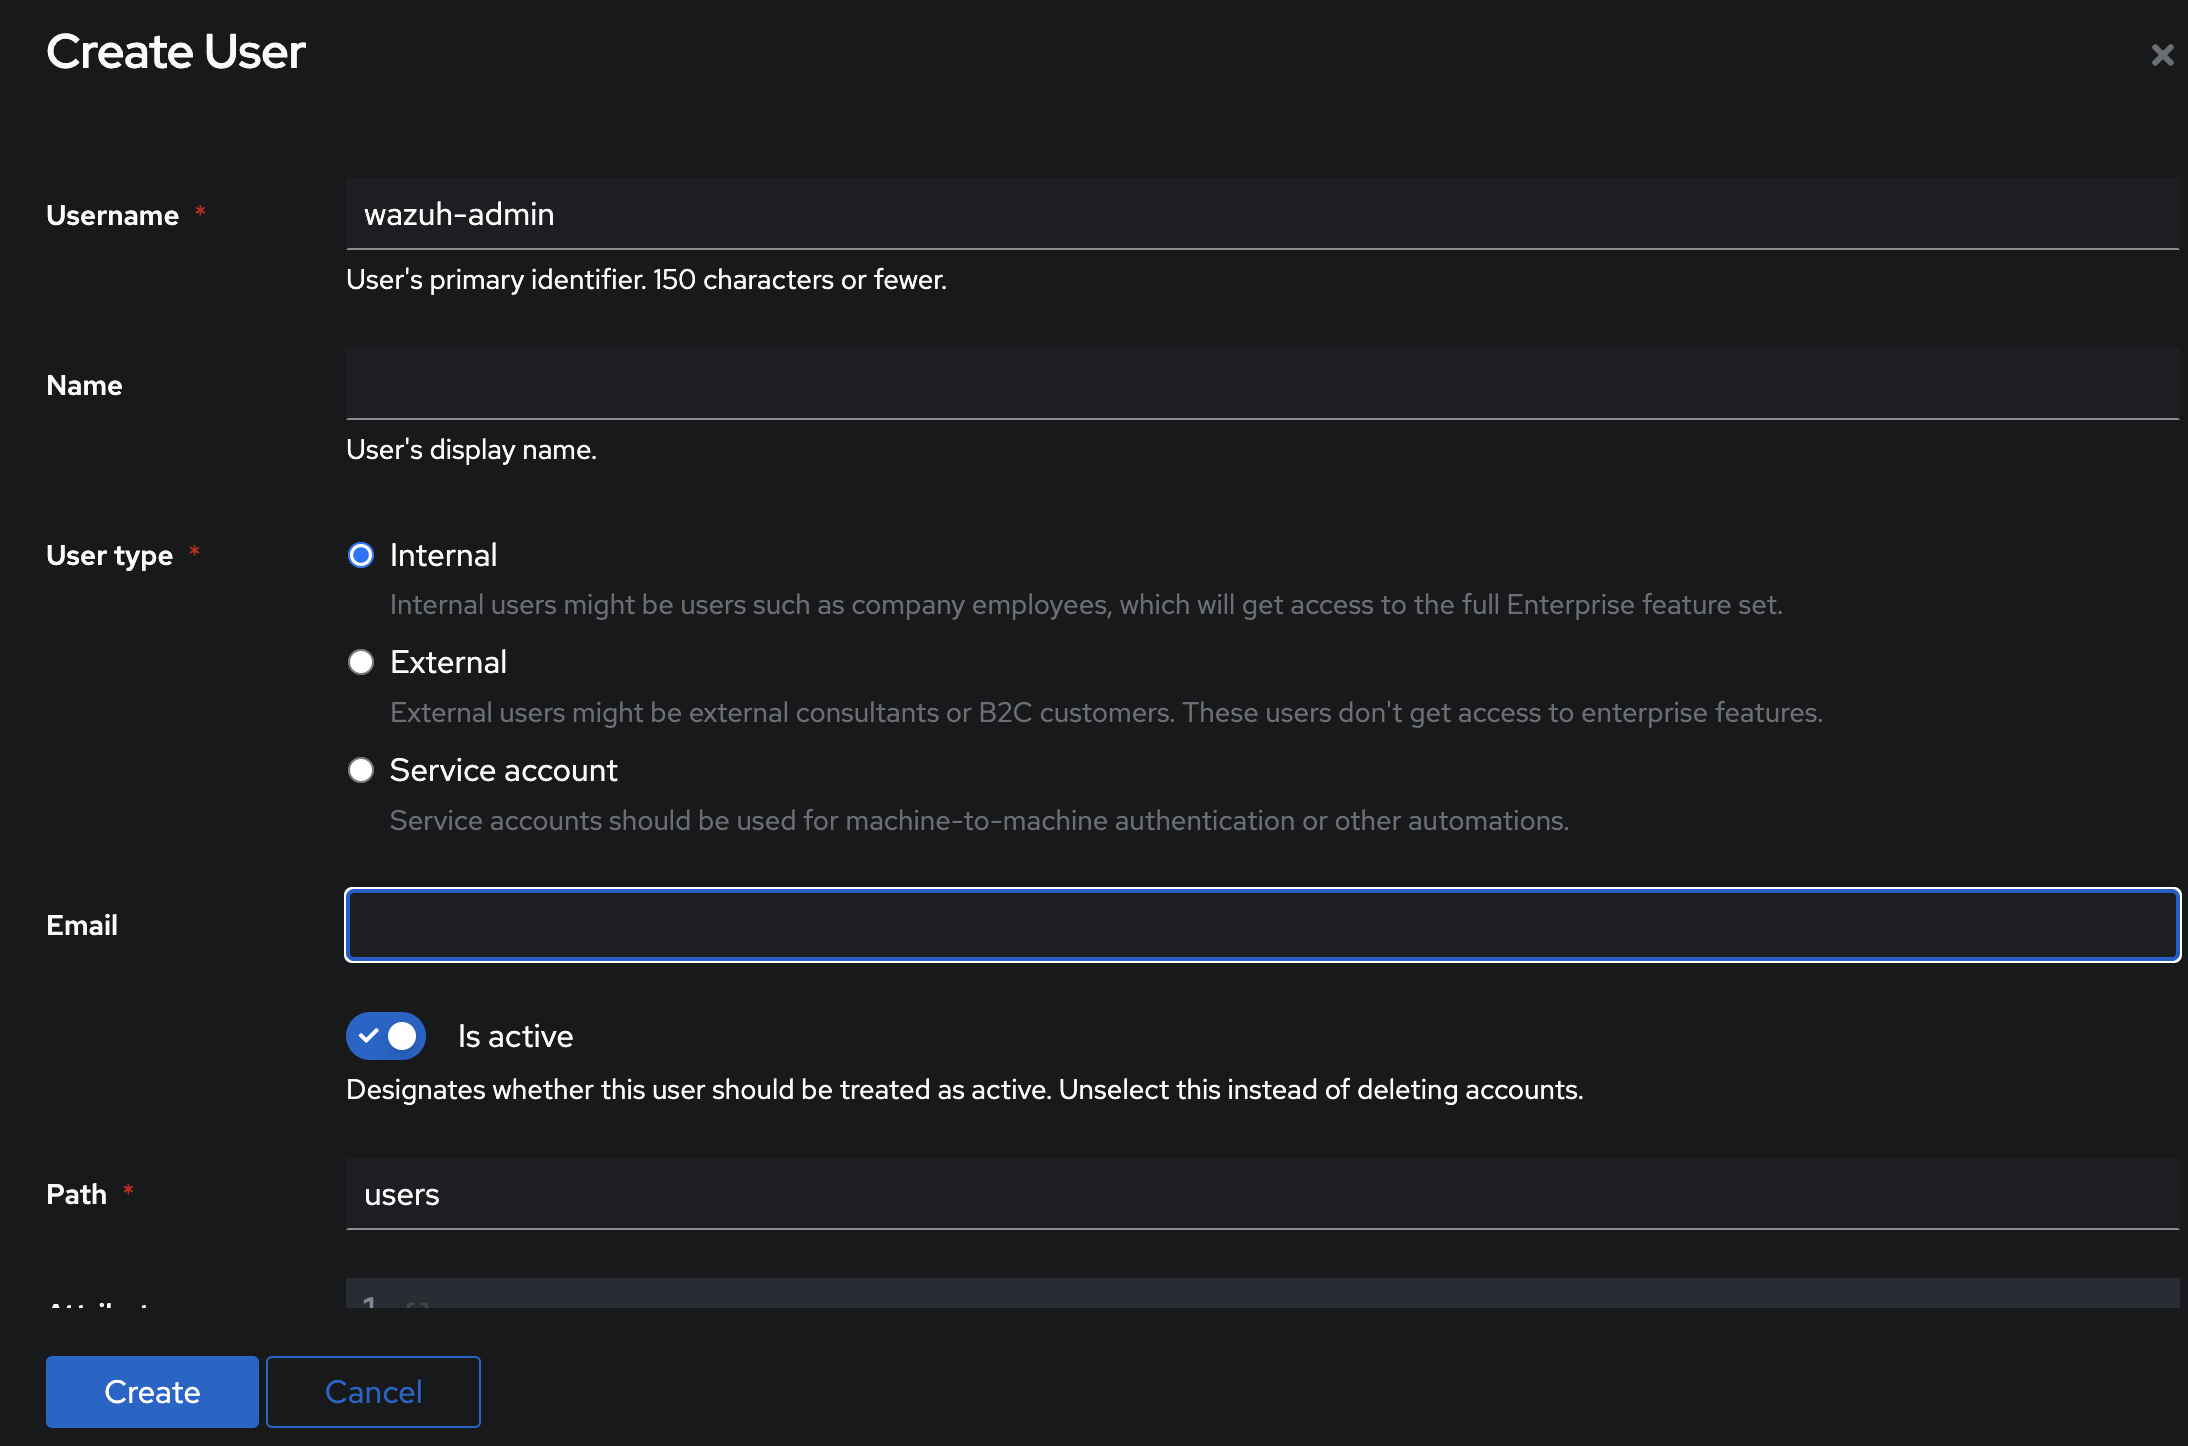
First, I would suggest to create a dedicated user account, e.g. called wazuh-admin -
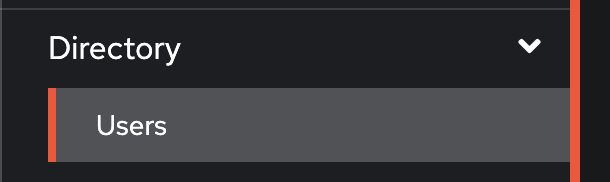
to do that click on Directory -> Users in the navigation on the left side of the dashboard.
Next up click the blue Create button in the middle of the screen.

Add a username and leave the rest as default.
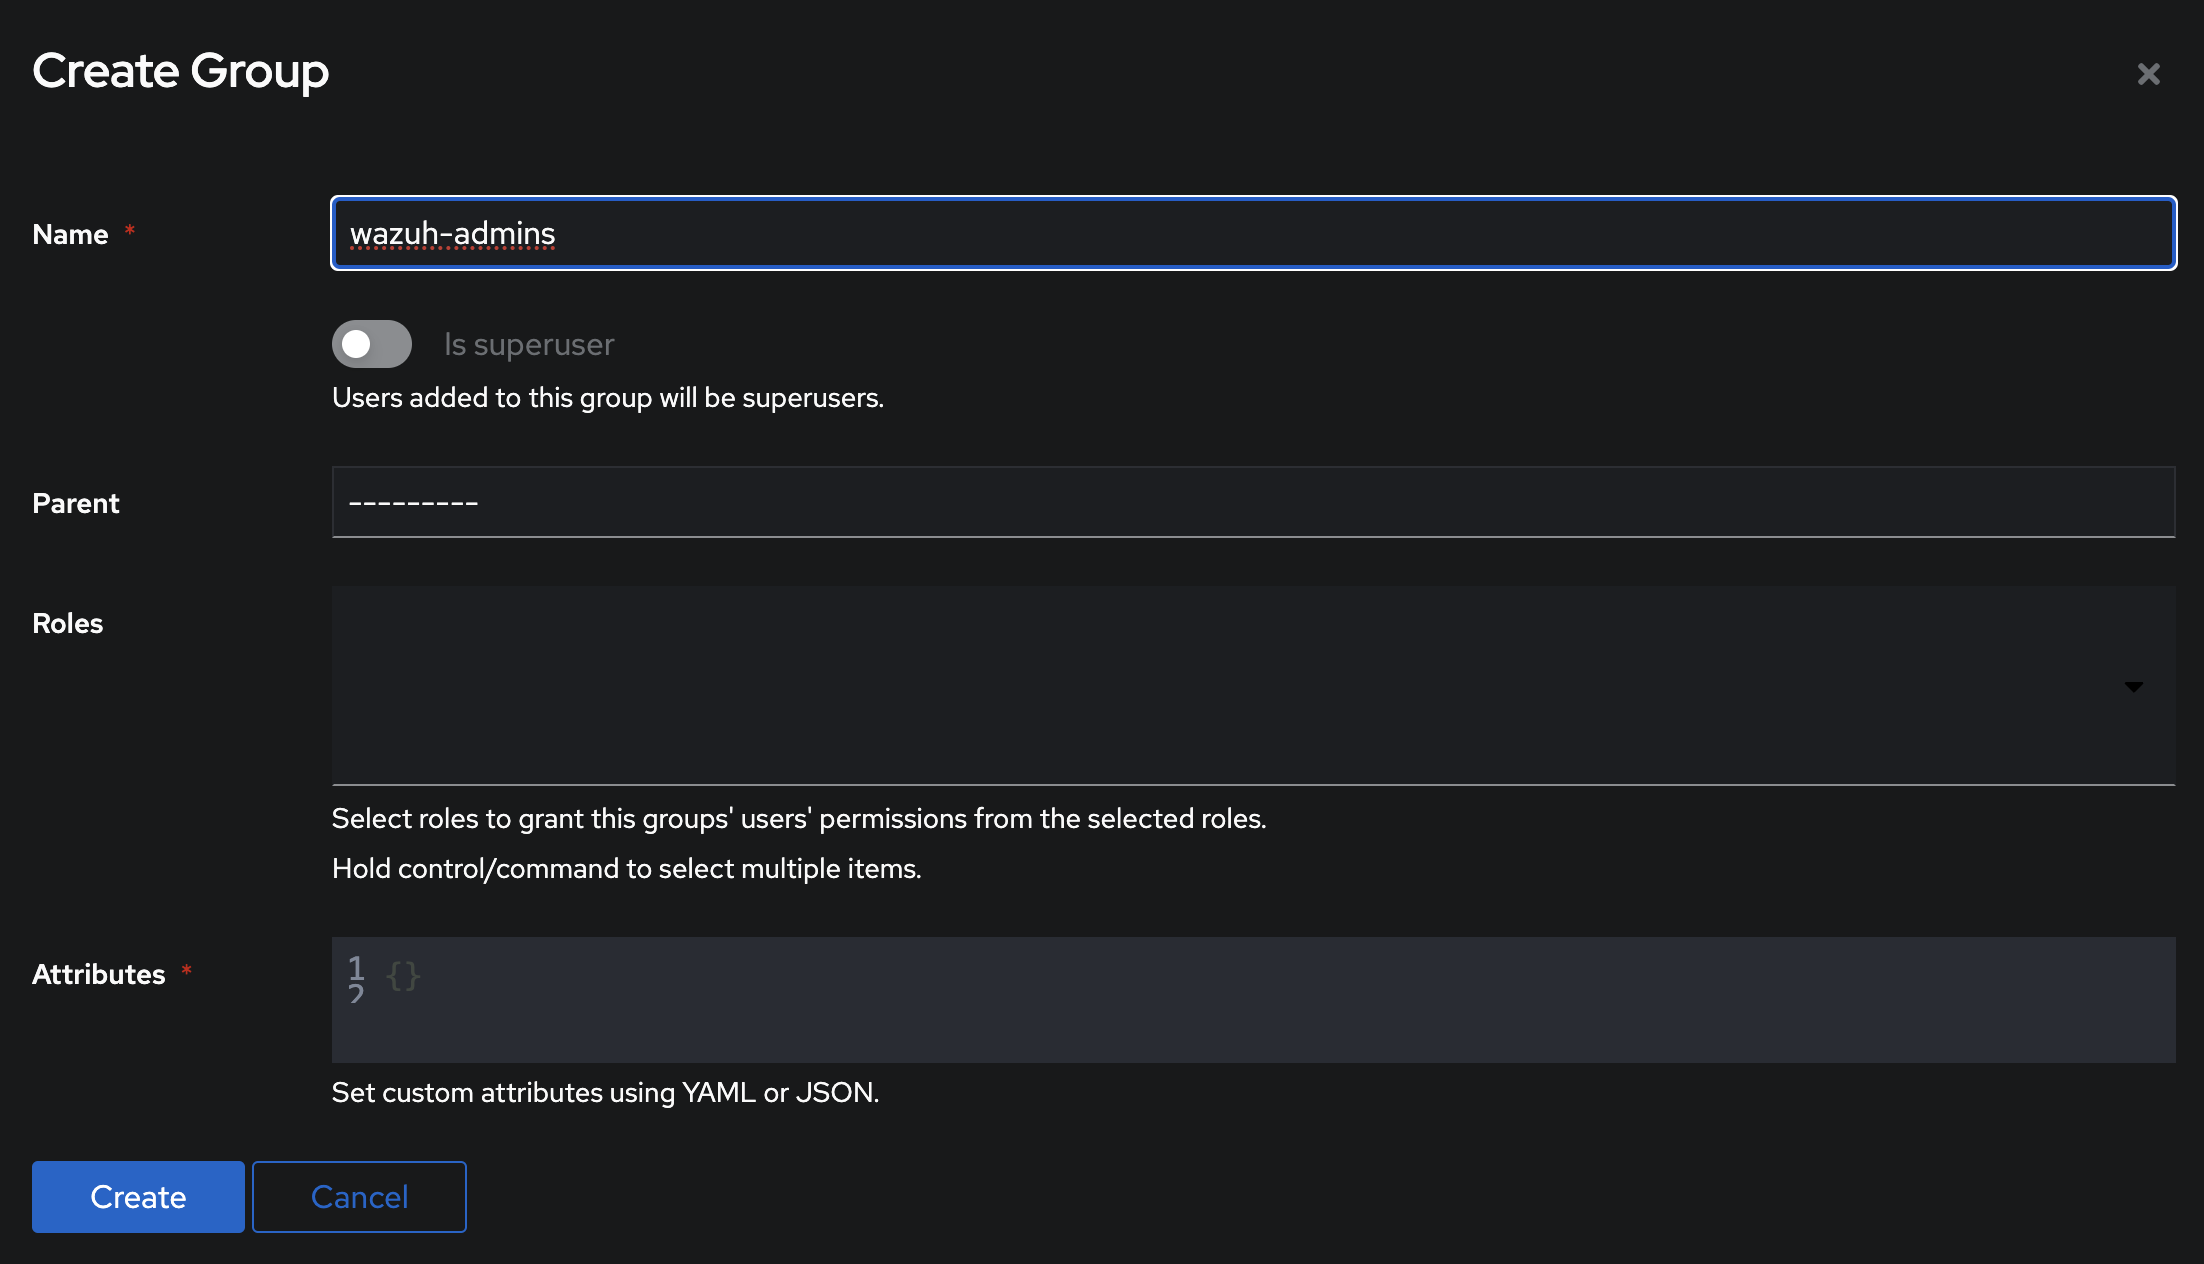
Then create a group and add the wazuh-admin user into it

authentik provider
Now is the time to create a provider - providers are essentially beacons for external applications to ask for the user details and validate the tokens the user provides after login.
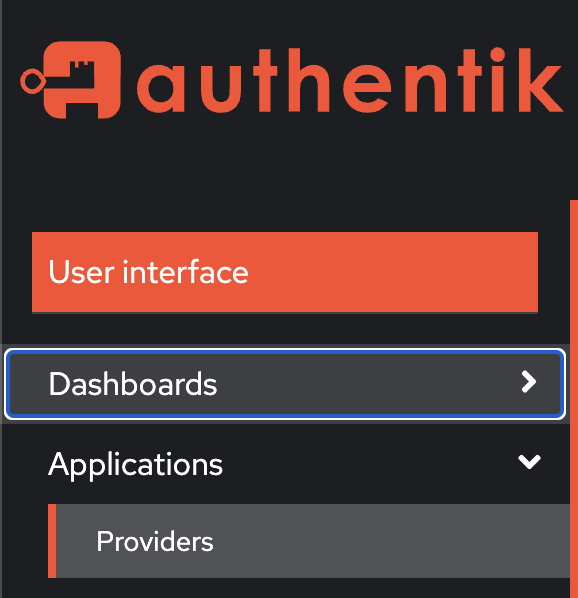
We can find them under Applications -> Providers and once again clicking the big blue button in the middle of the screen brings us to the form to create a new one.
We need to choose SAML as the provider type.
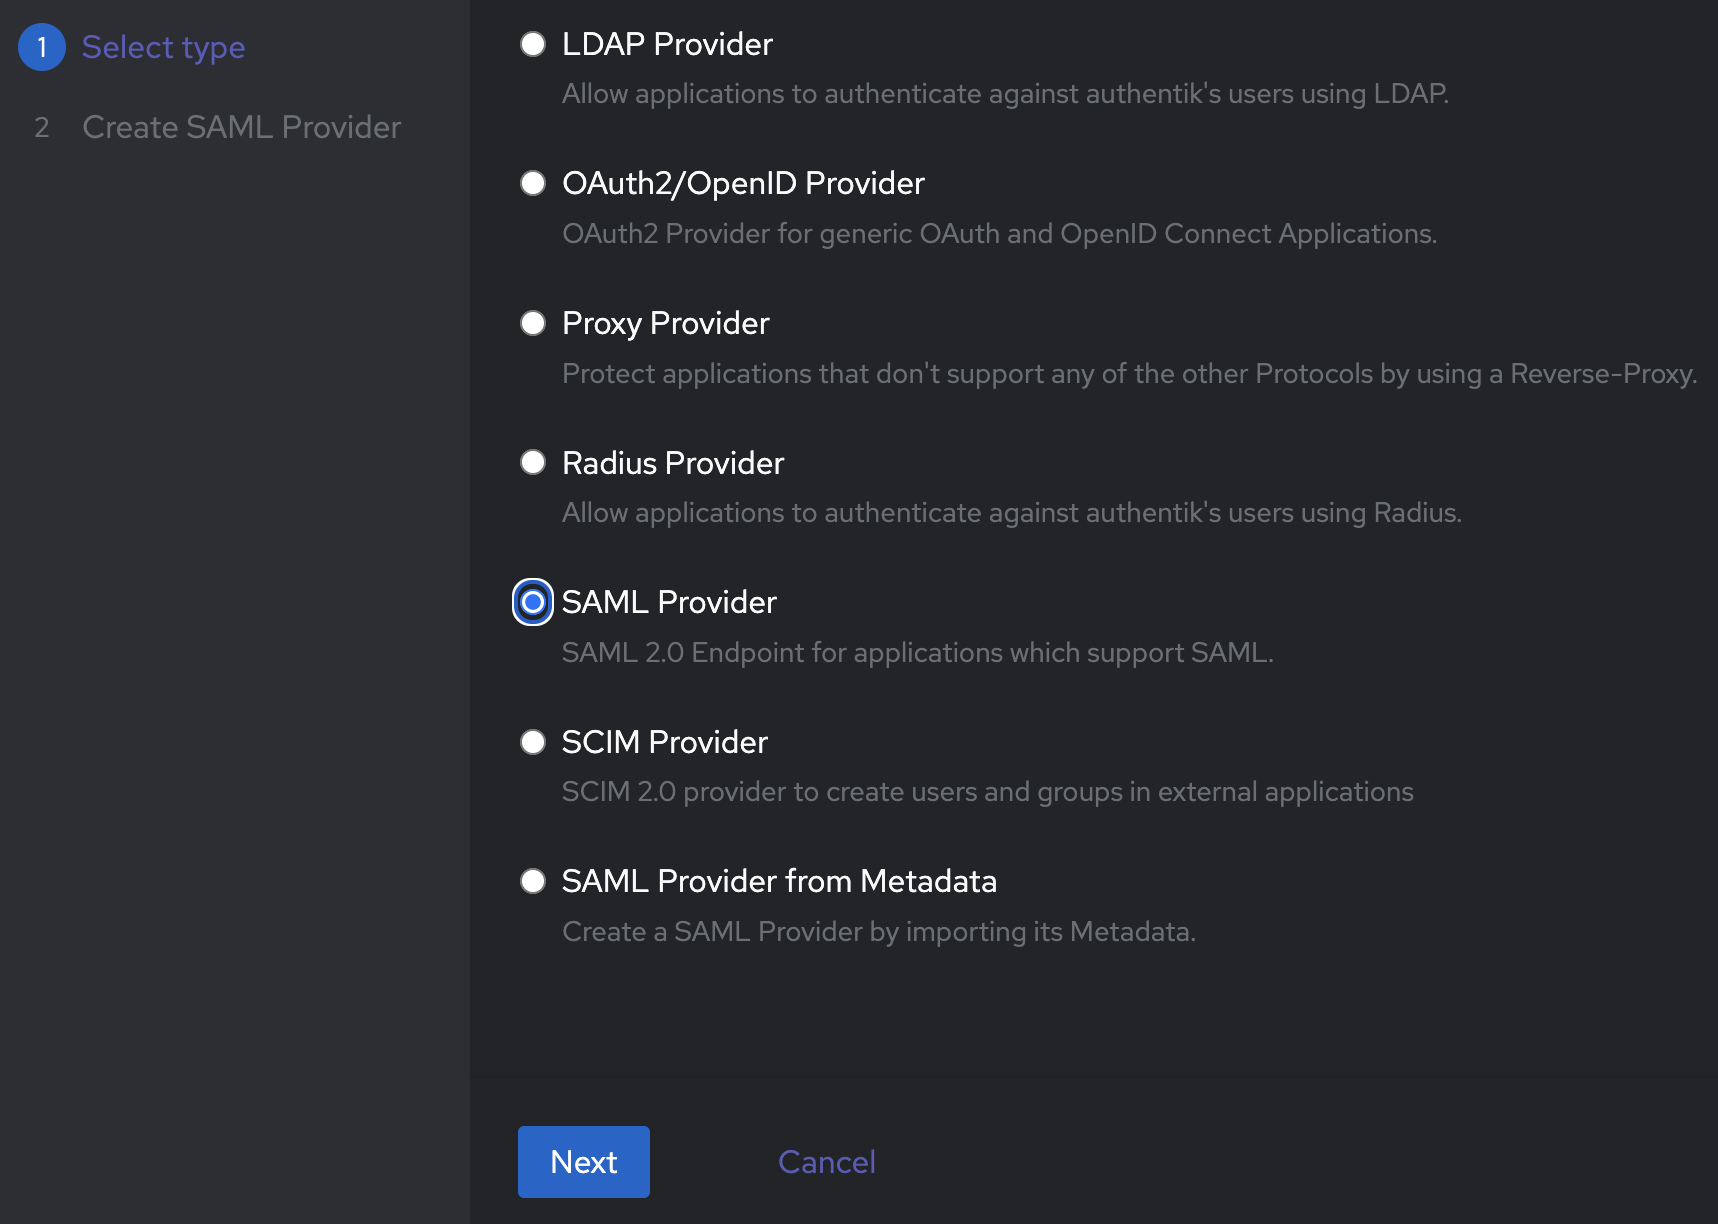
Then give it a descriptive name - e.g. SAML
select
Authentication Flow (e.g.
default-authentication-flow)Authorization Flow (e.g.
default-provider-authorization-implicit-constent)set the ACS URL (
https://<wazuh_ip_or_hostname>/_opendistro/_security/saml/acs)issuer (
wazuh-saml)Service Provider Binding -
Post
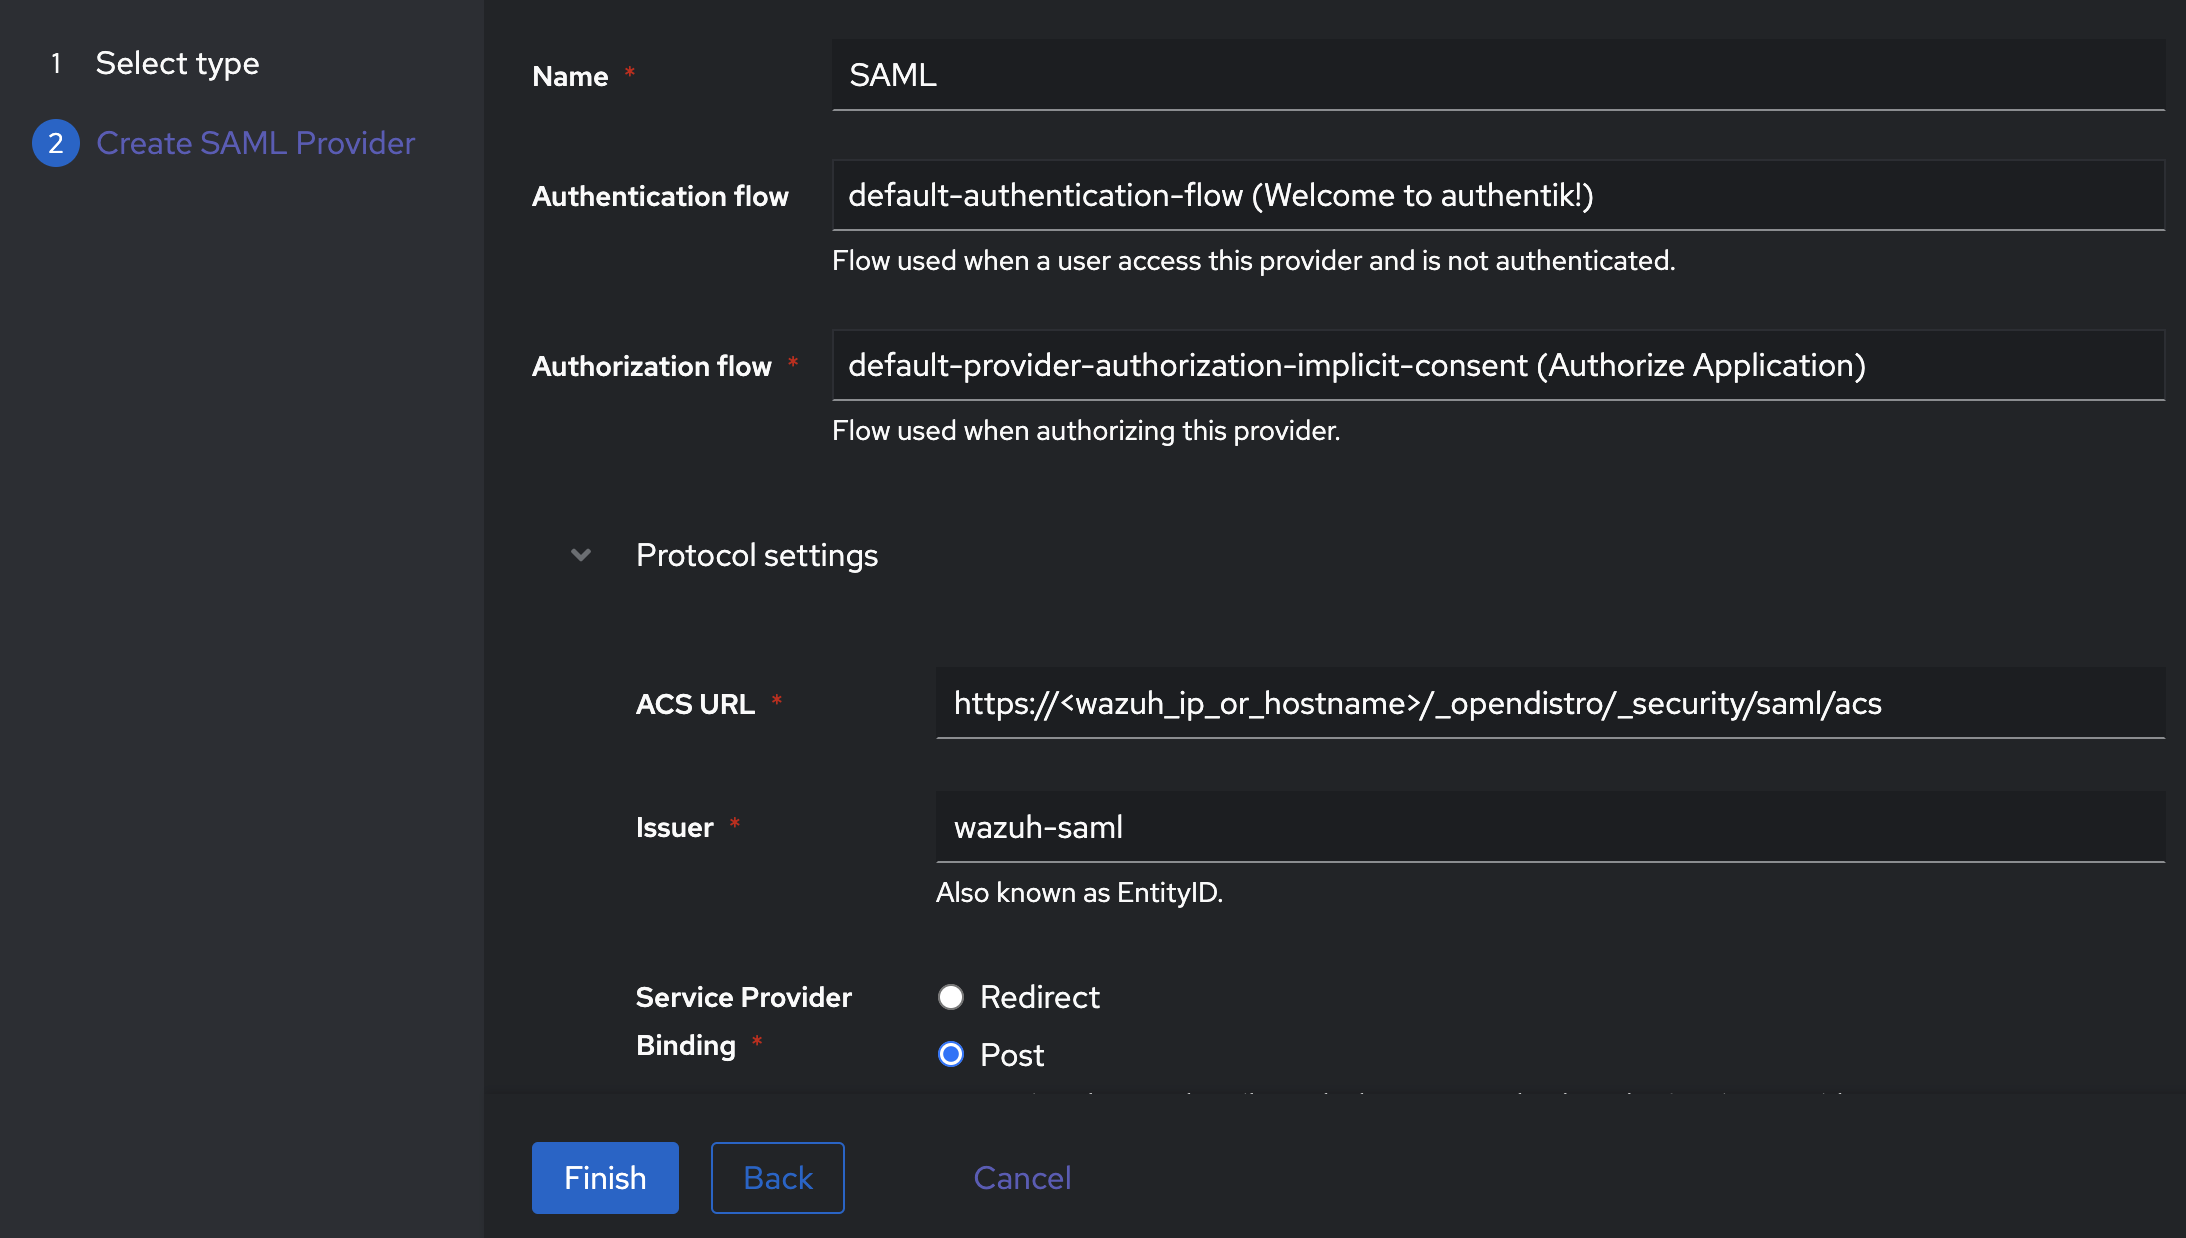
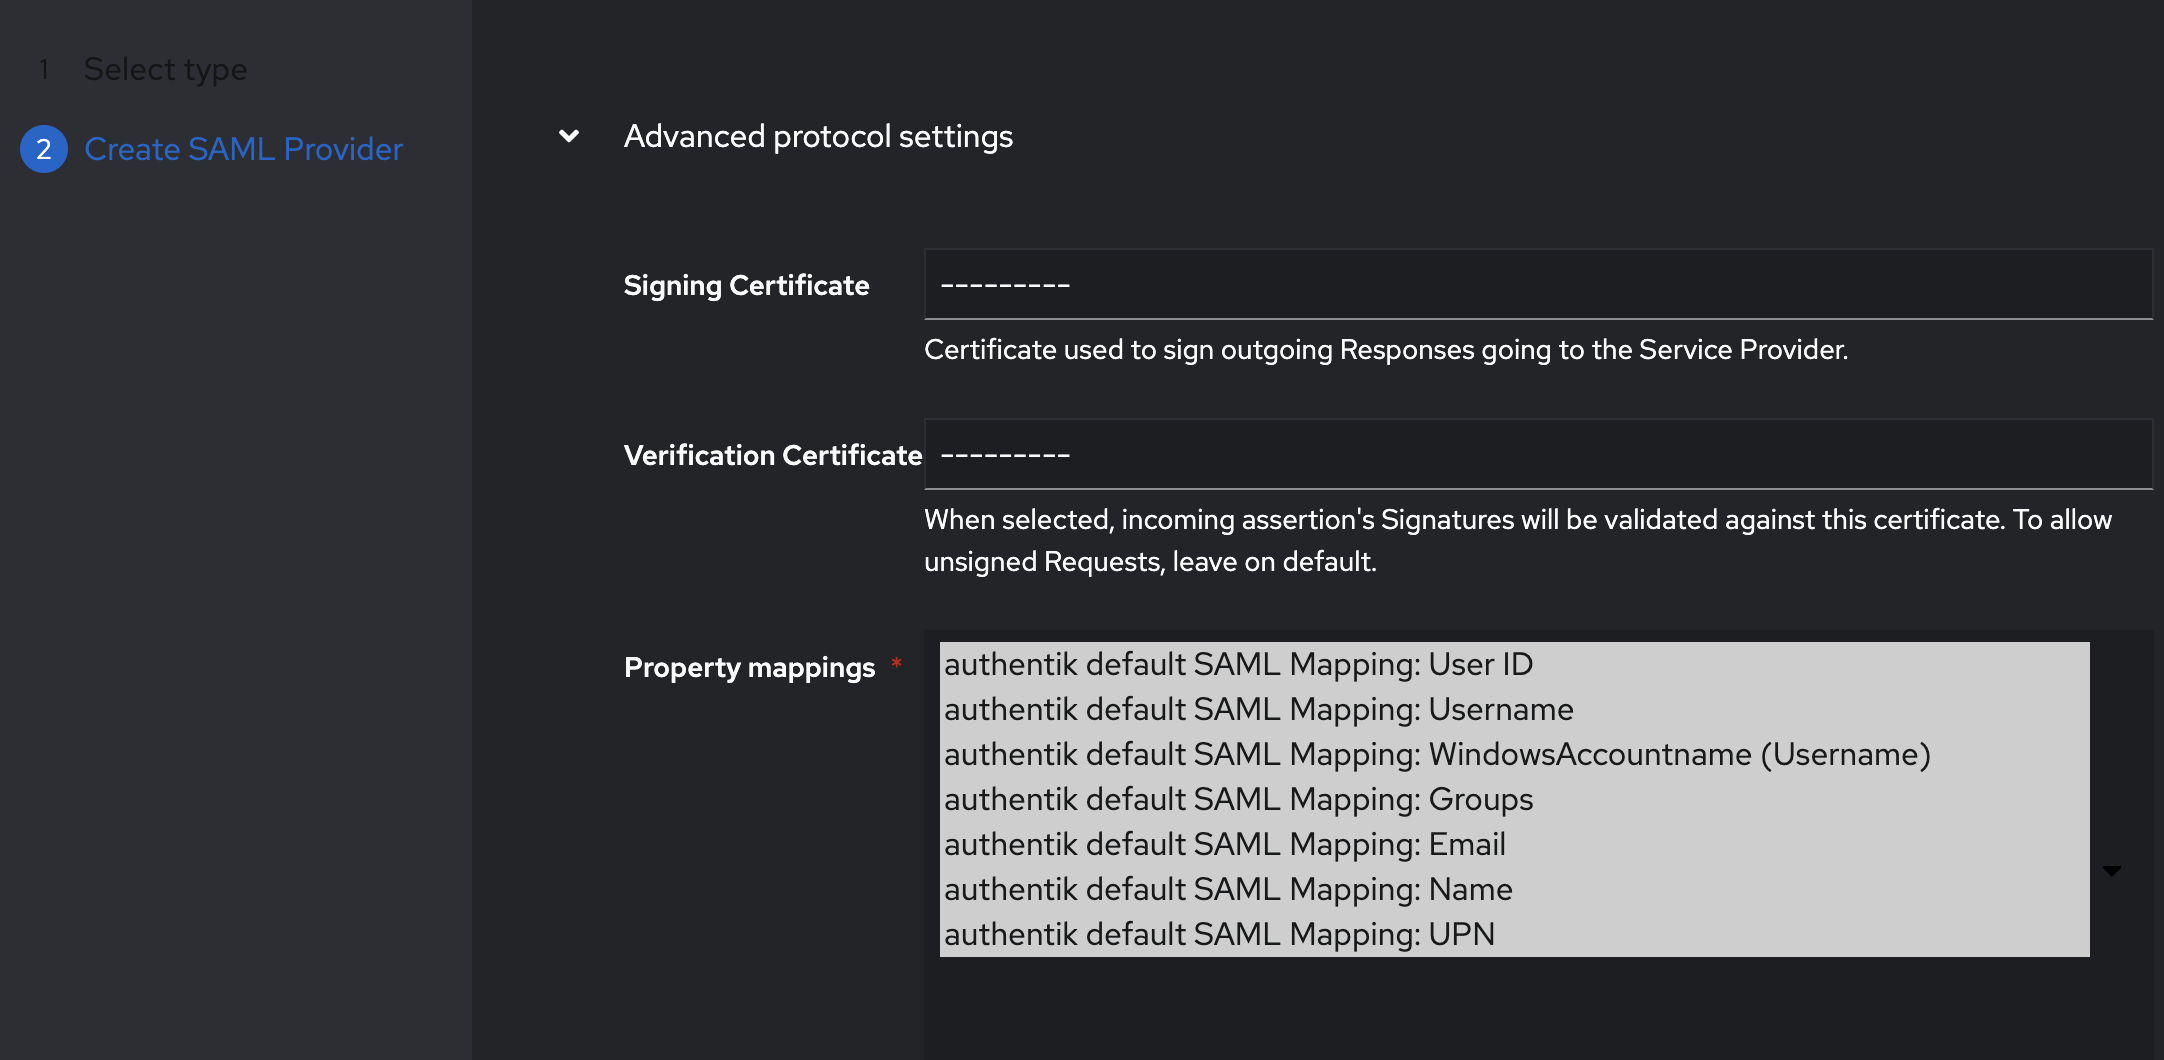
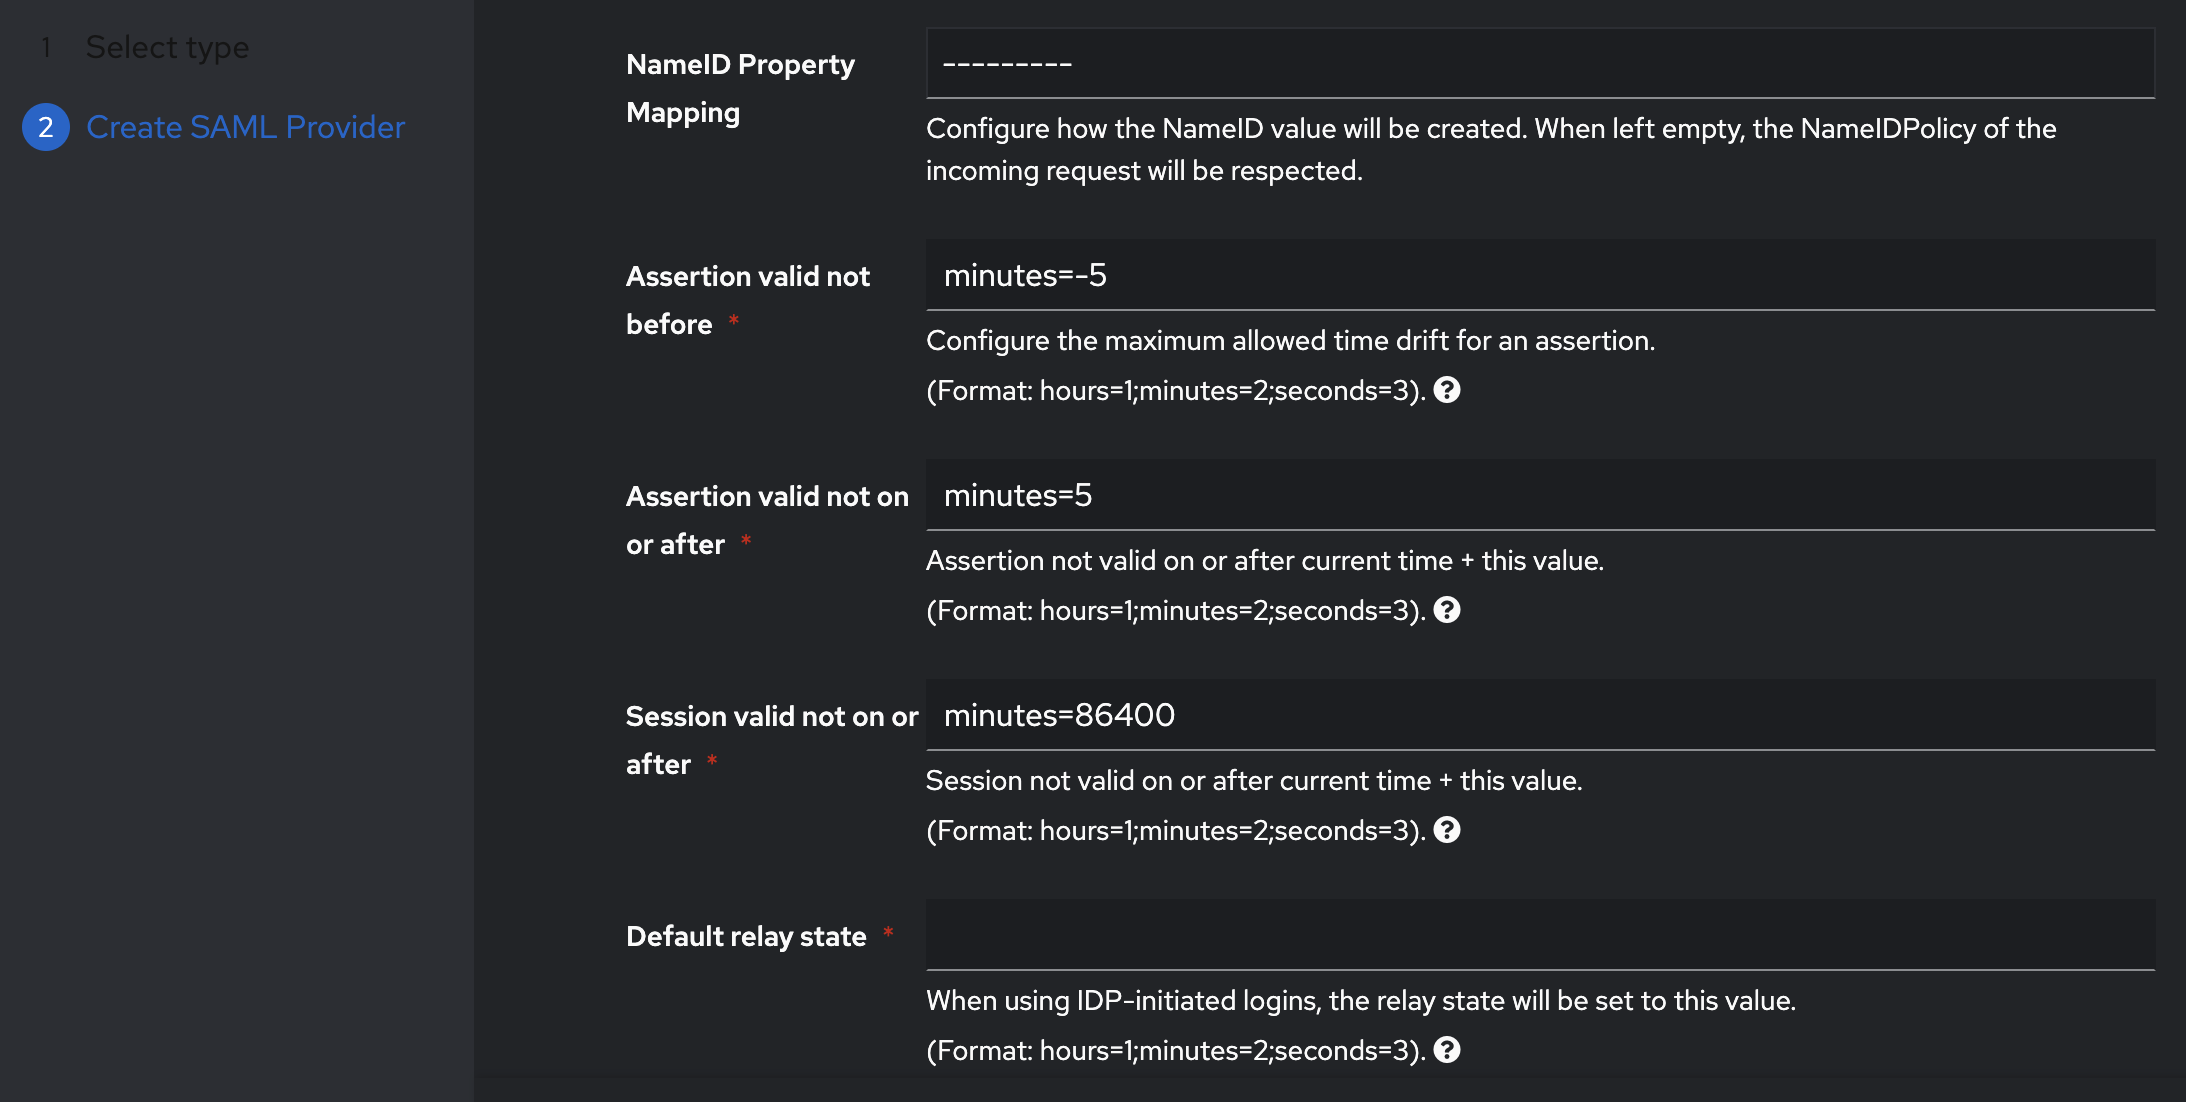
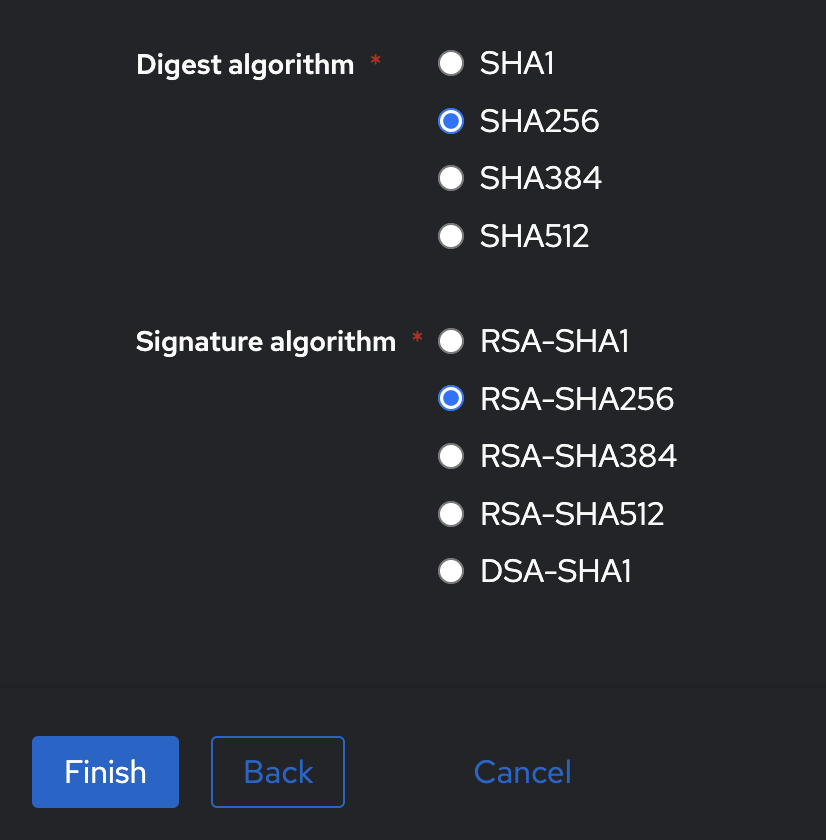
Leave all the rest in the advanced protocol settings as default for now and click on "Finish".
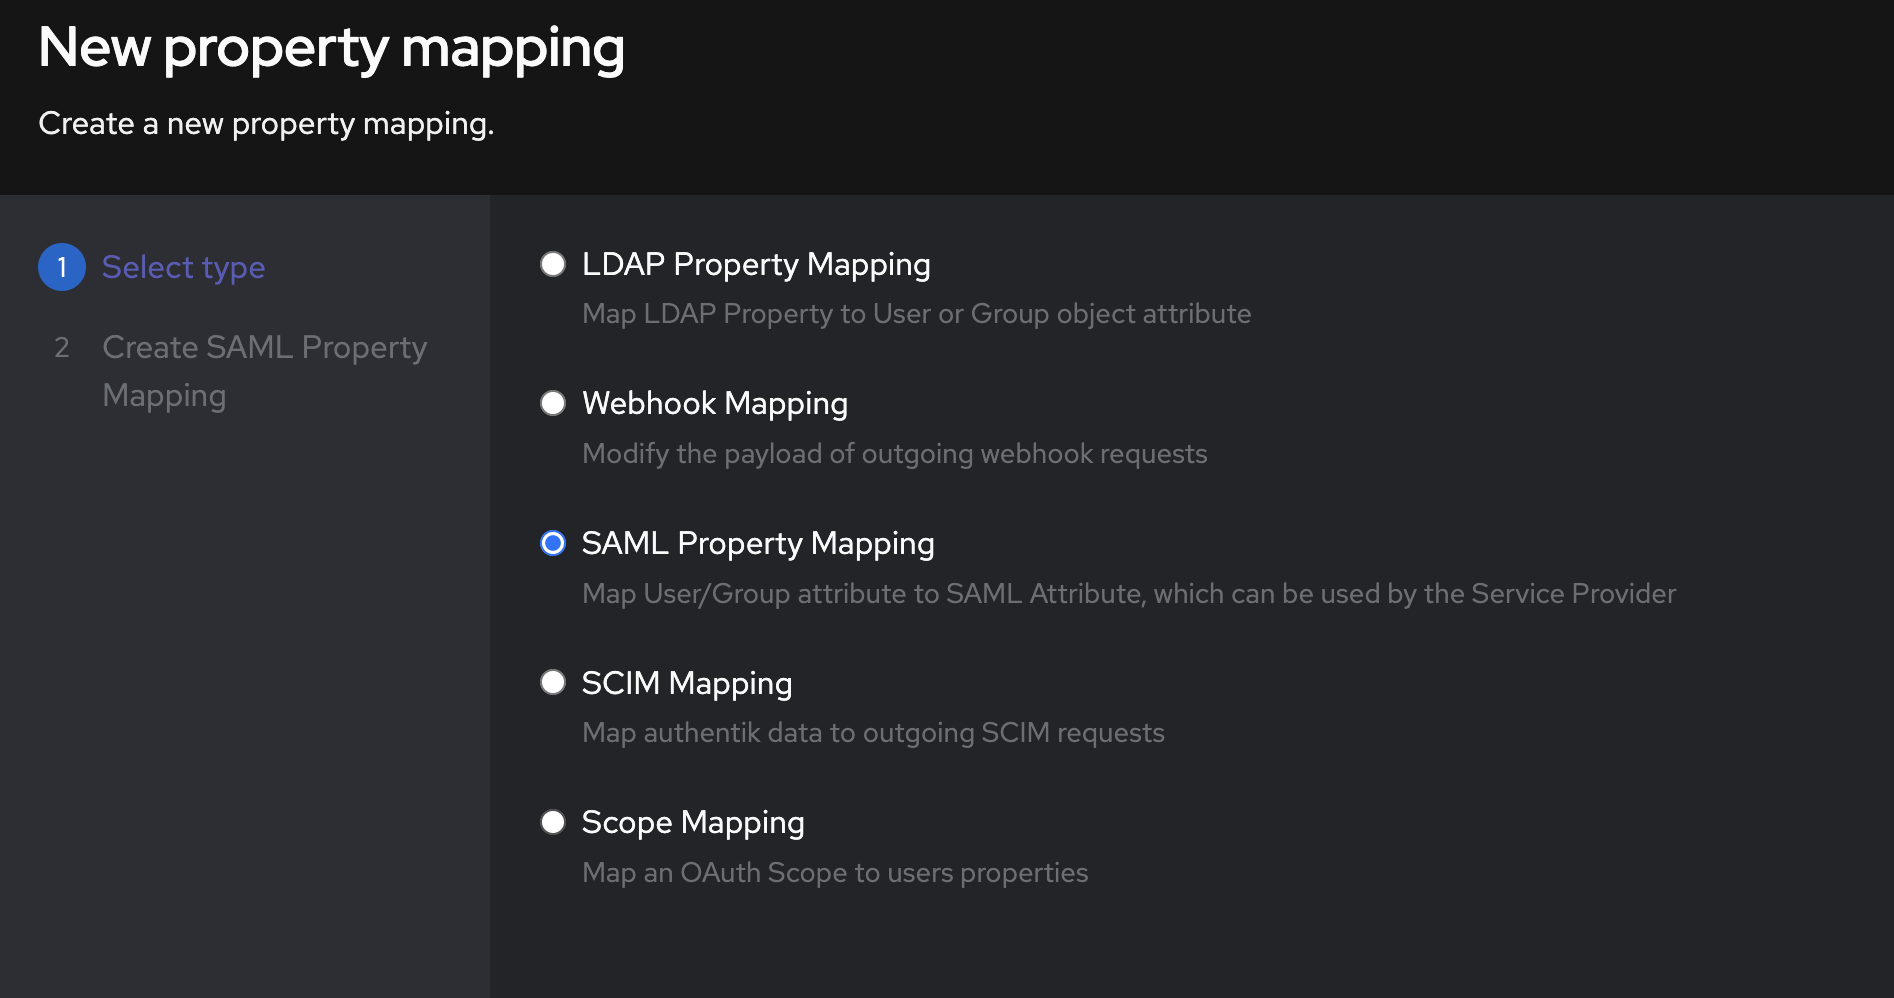
Next step is a property mapping - this is a function that takes information from the authentik users (e.g. username, email, groups) and provides it to the external service (wazuh).
We will use this to map group memberships (e.g. wazuh-admins) as backend roles that are used for RBAC (Role-based Access Control) in wazuh.
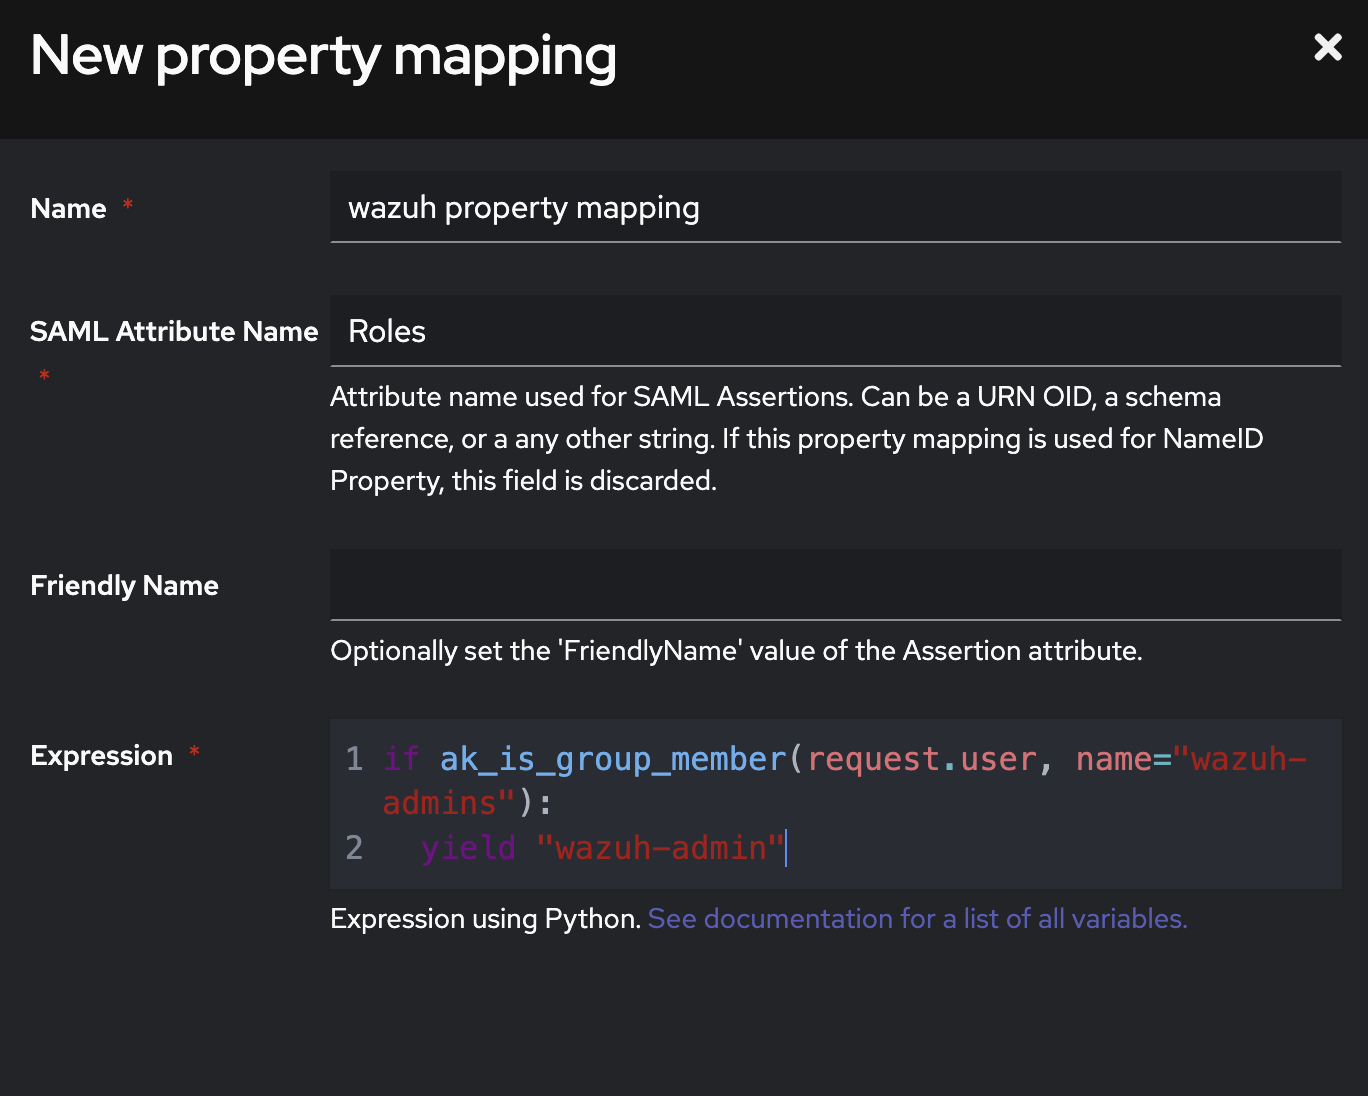
Without further ado - here is how to create a property mapping - under Customisation -> Property Mappings. Select the type and add the following details:
Name: wazuh property mapping
SAML Attribute Role: Roles
Expression:
if ak_is_group_member(request.user, name="wazuh-admins"):
  yield "wazuh-admin"
Certificate Setup
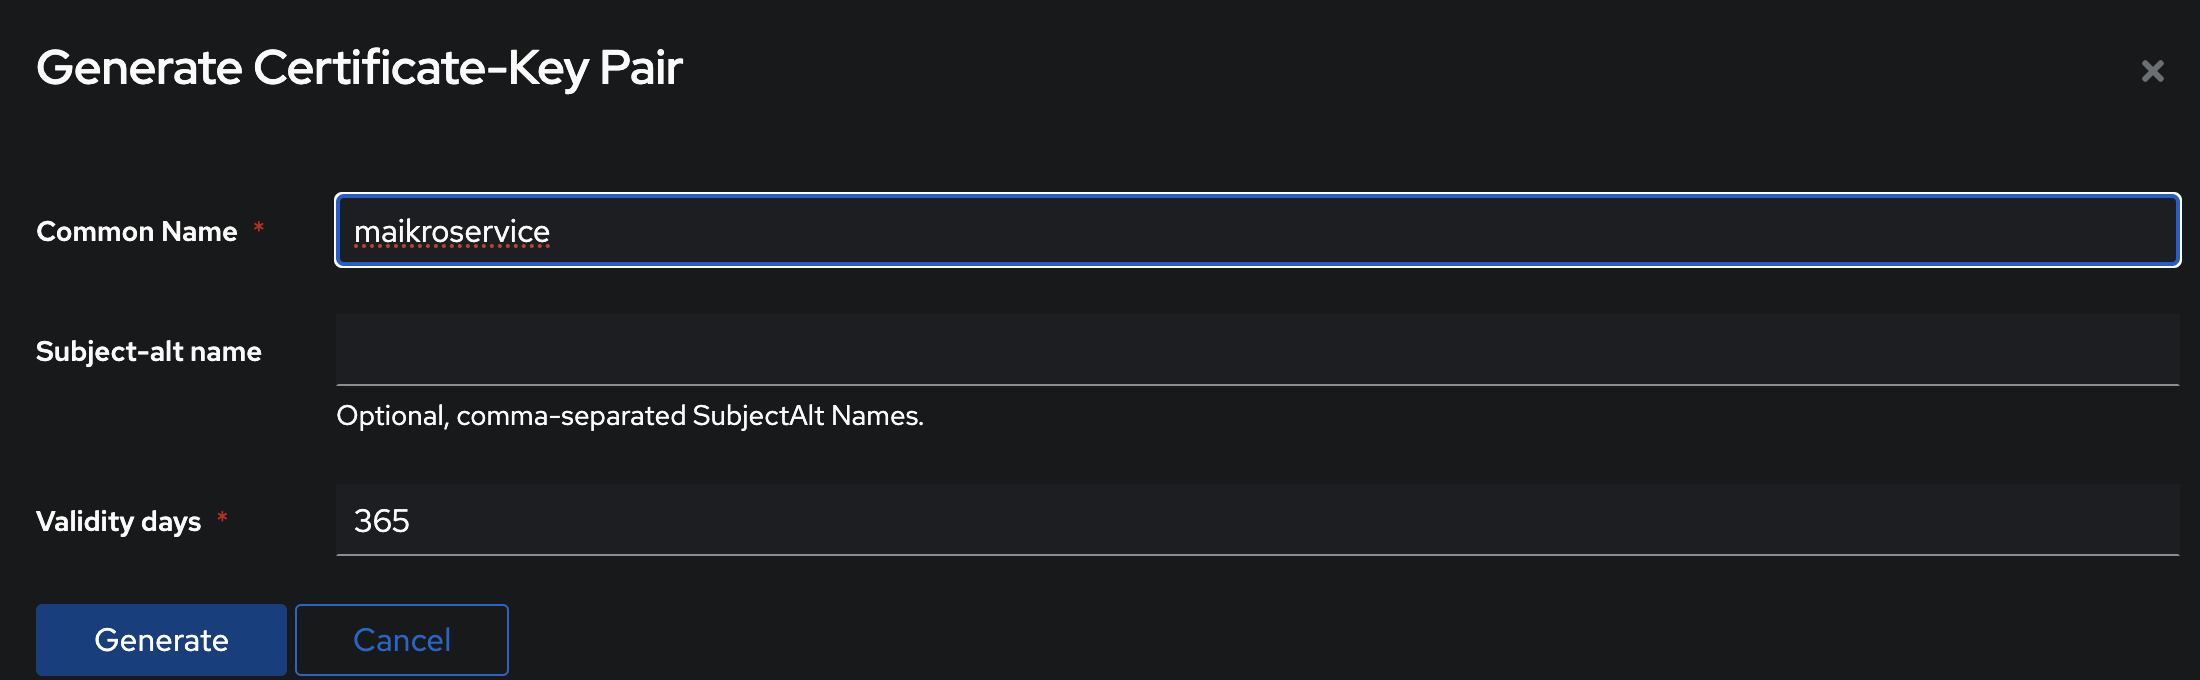
We want to secure our communication with SAML, and to do that we need a certificate that is ideally only used for the SAML setup.
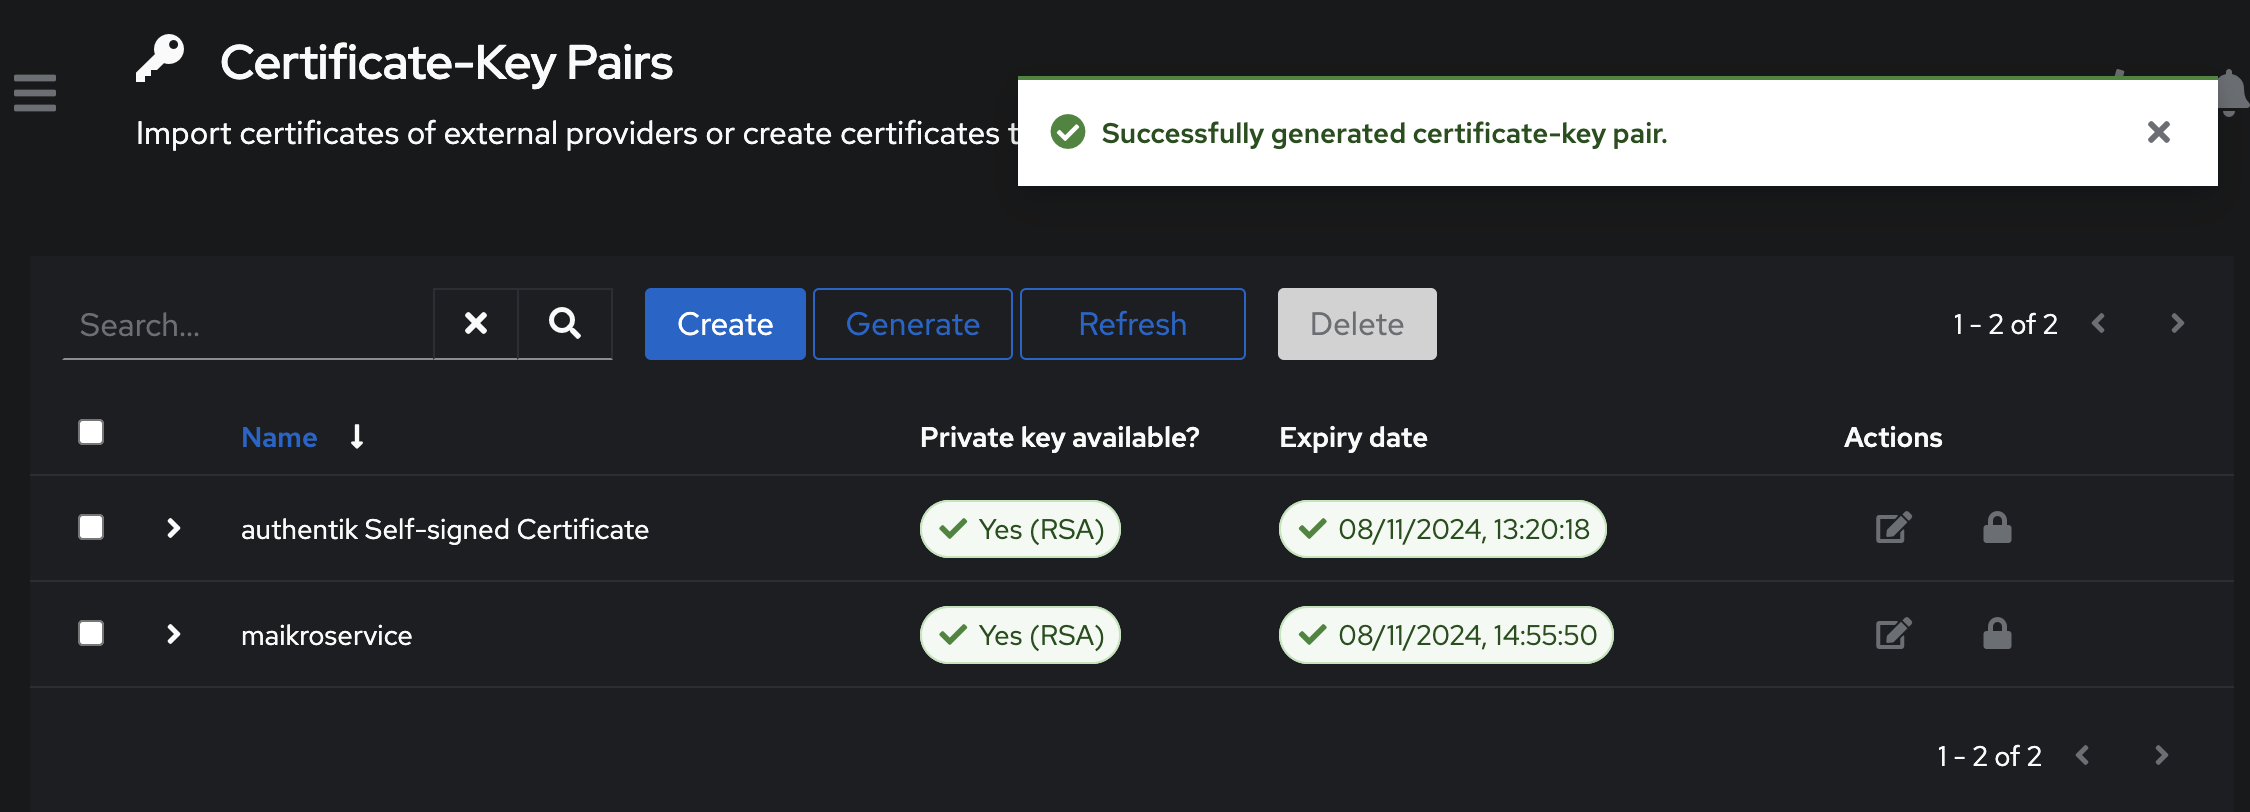
Lucky for us authentik has an option to generate and import them directly - under System -> Certificates you can find the option to Generate a new one.
Give it a name and set the validity period as 365 days and click Generate
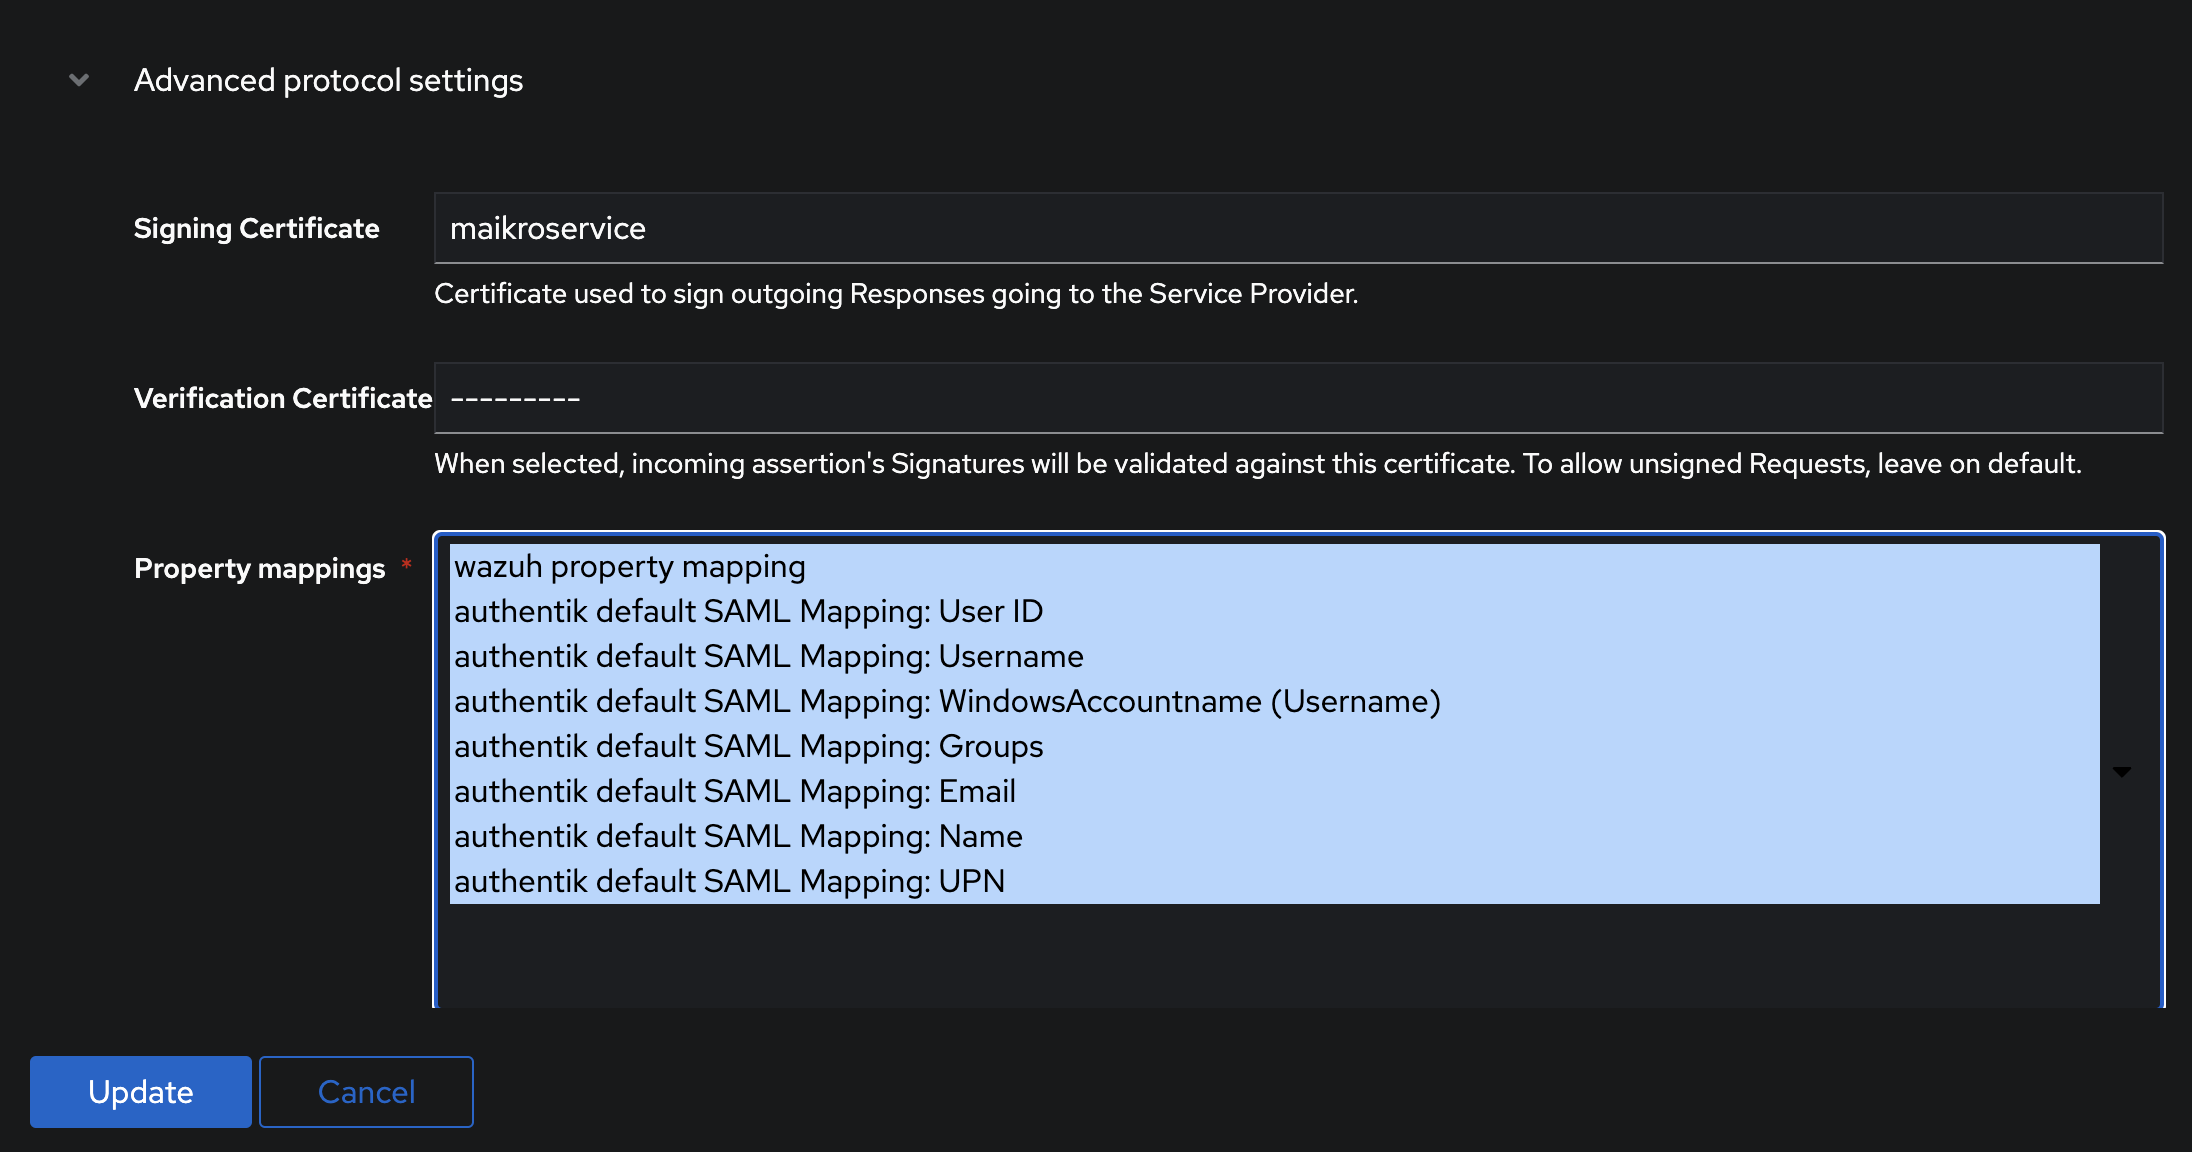
Adjust SAML Provider
Select the SAML provider and then click the Edit button - Then under Advanced protocol settings select the correct Signing Certificate and make sure to also select the wazuh property mapping in the Property mappings.
Once that is done push the Update button.
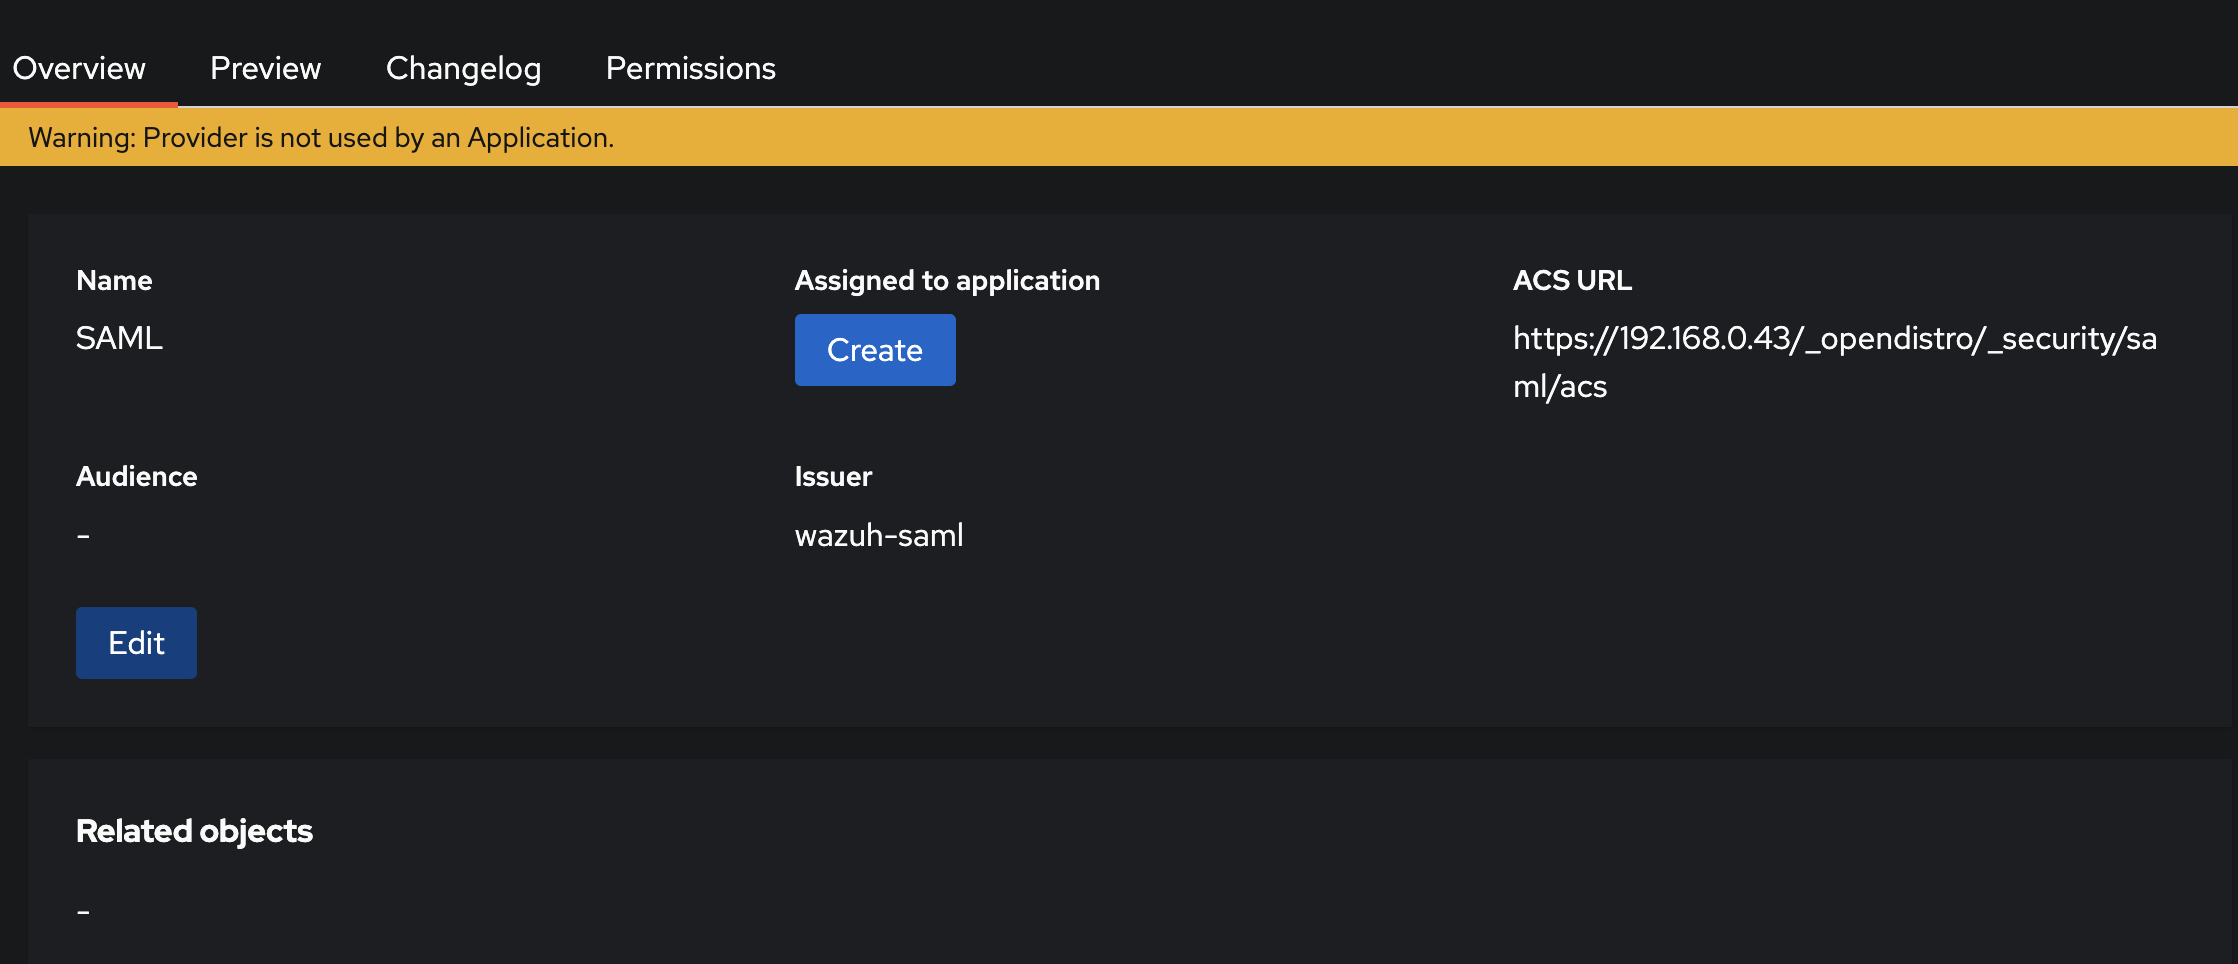
The last step on the authentik side is to create an application that uses our SAML provider.
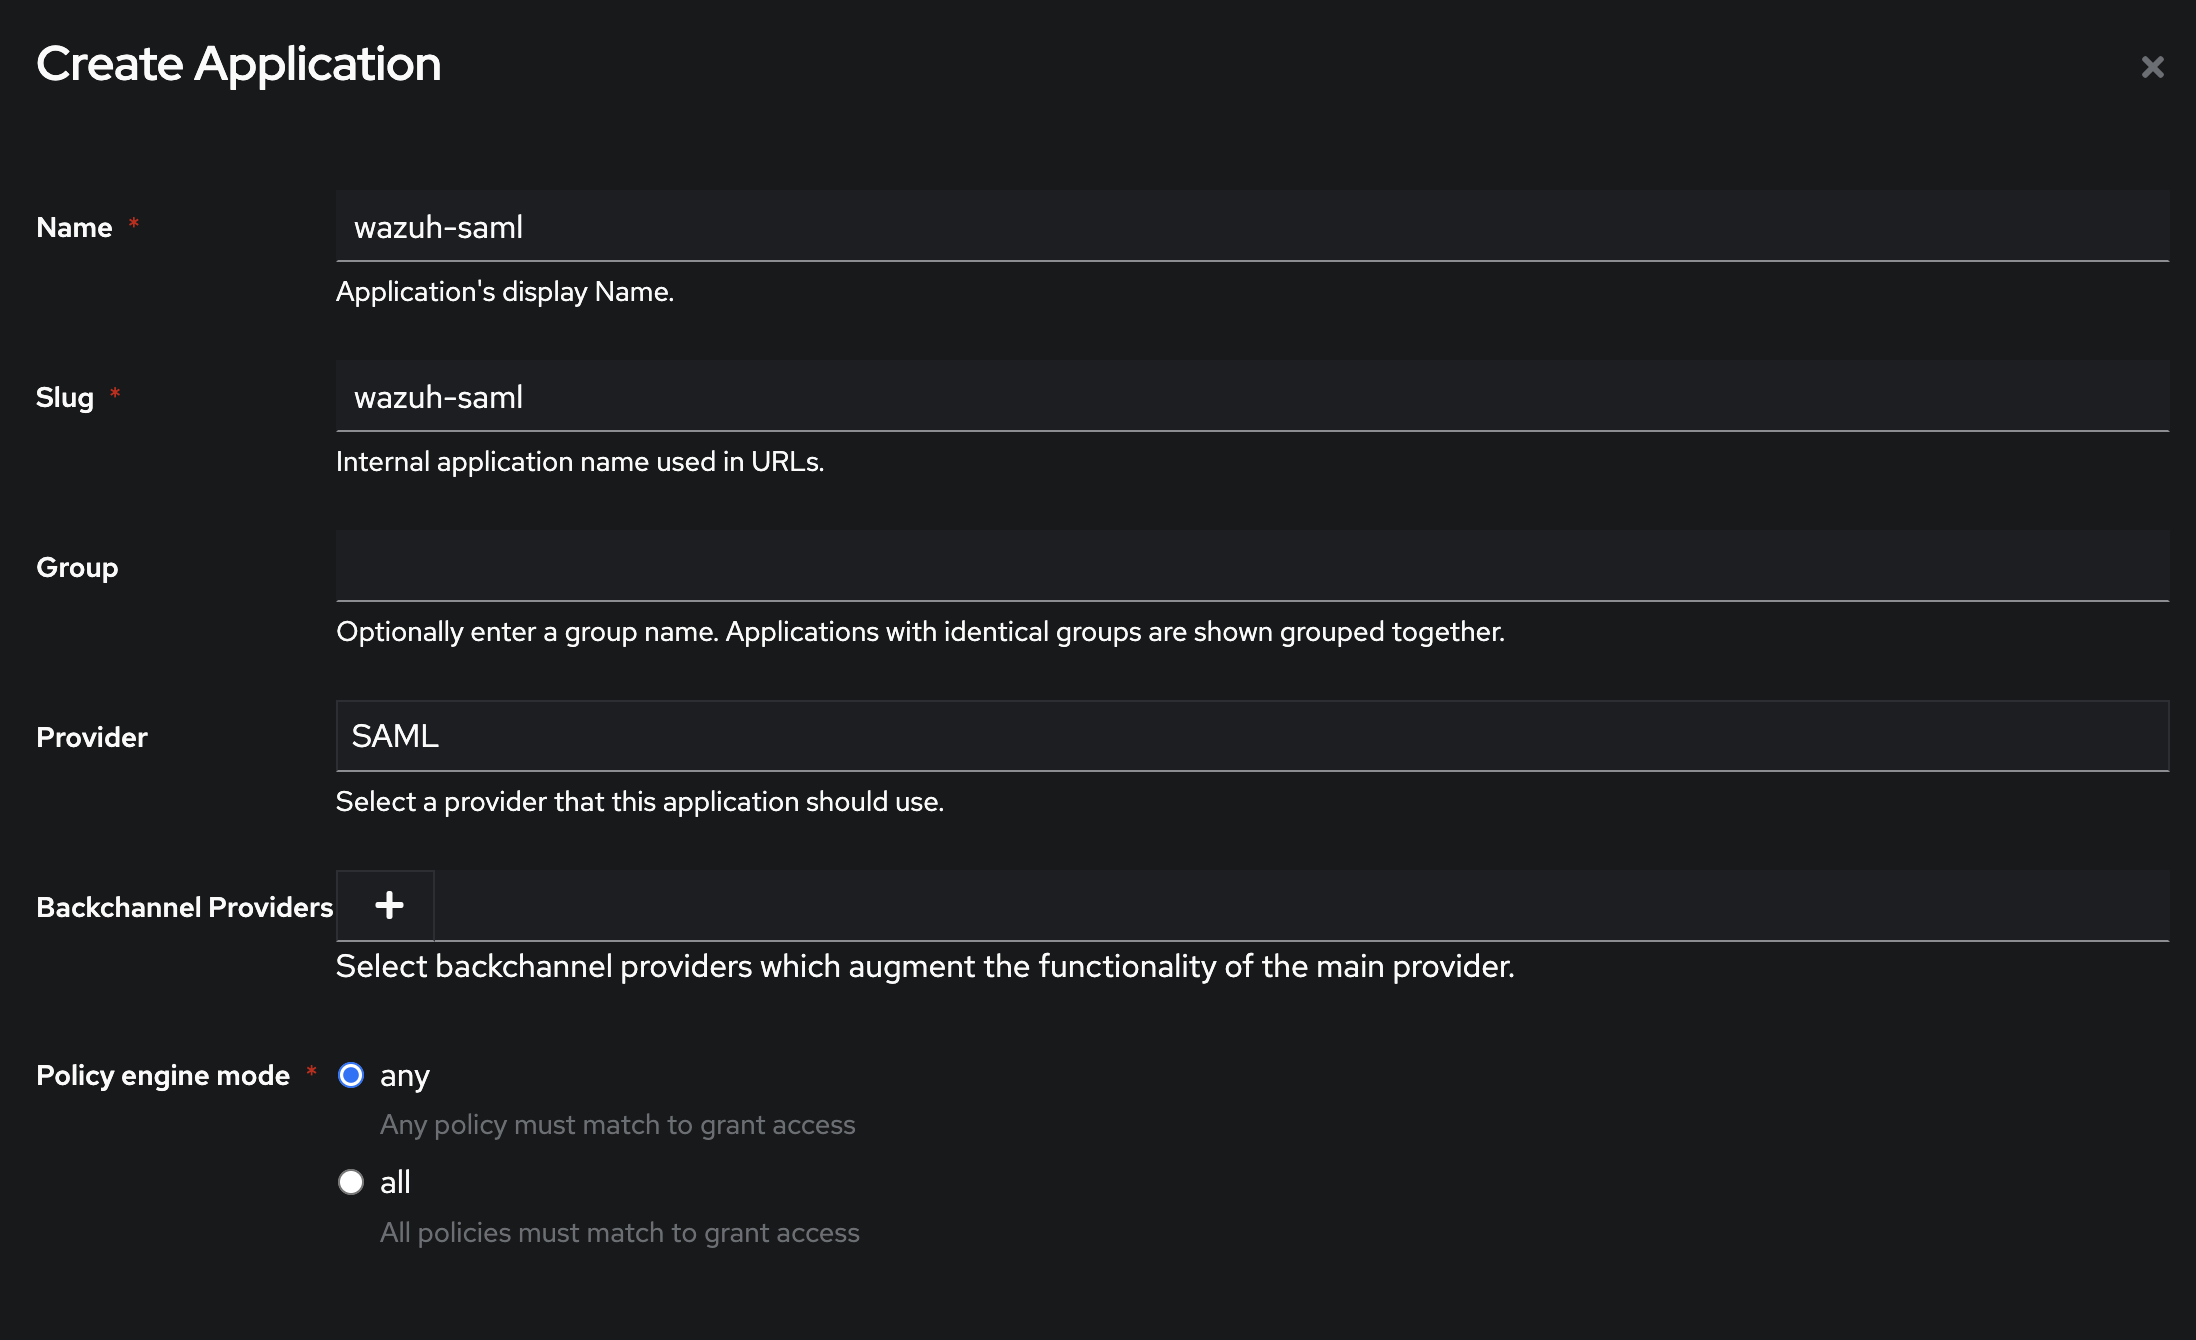
authentik application
You can do that via the nagivation bar Applications -> Applications - Create and setting the following parameters:
Name:
wazuh-samlSlug:
wazuh-samlProvider:
SAMLPolicy Engine:
any
Leave the UI as default or upload a logo you would like to use to identify the application in the dashboard - e.g. https://avatars.githubusercontent.com/u/13752566?s=200&v=4
The last step is to download the metadata file from the provider - or as an alternative copy the download url.
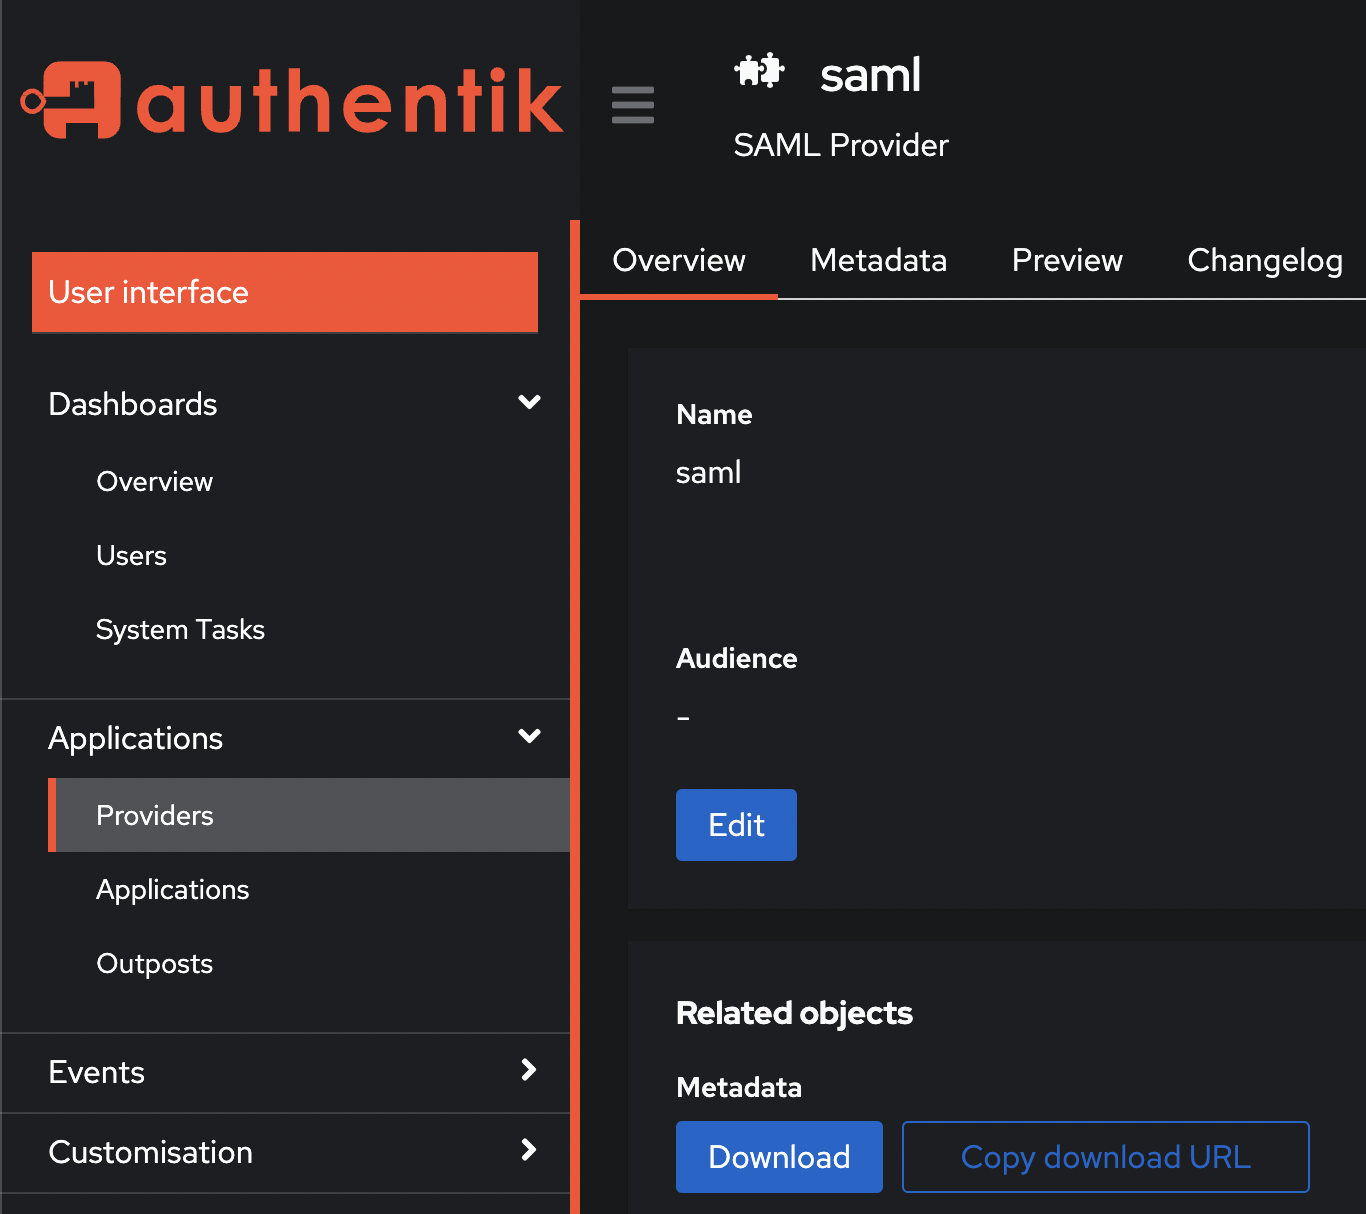
Nice - that wraps up the authentik part. Now to wazuh.
wazuh setup for SAML
The first file that we have to adjust is /etc/wazuh-indexer/opensearch-security/config.yml - open it with your favorite text editor (e.g. nano) and add the information below.
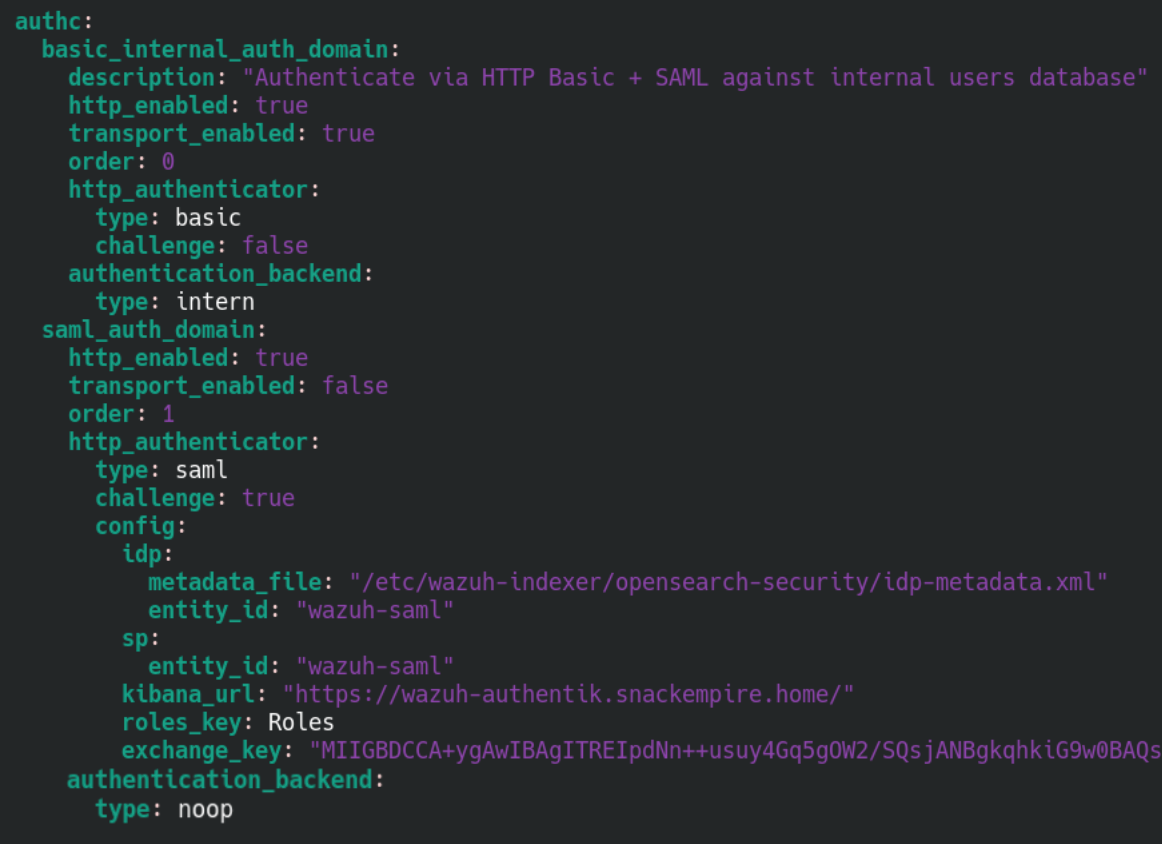
authc:
  basic_internal_auth_domain:
    description: "Authenticate SAML against internal users database"
    http_enabled: true
    transport_enabled: true
    order: 0
    http_authenticator:
      type: basic
      challenge: false
    authentication_backend:
      type: intern
  saml_auth_domain:
    http_enabled: true
    transport_enabled: false
    order: 1
    http_authenticator:
      type: saml
      challenge: true
      config:
        idp:
          metadata_file: "/etc/wazuh-indexer/opensearch-security/idp-metadata.xml"
          entity_id: "wazuh-saml"
        sp:
          entity_id: "wazuh-saml"
        kibana_url: "https://<YOUR_WAZUH_IP_HOSTNAME>/"
        roles_key: Roles
        exchange_key: "MIIGBDCCA+SQs..."
    authentication_backend:
      type: noop
The lines that are variable are -
idp.metadata_file- the location/name you gave the downloadedmetadata.xmlfile - I would recommend putting it in/etc/wazuh-indexer/opensearch-security/and naming itidp-metadata.xml.keep in mind that you need to change ownership and rights on the file to make sure it is properly usable by wazuh
                chown wazuh-indexer:wazuh-indexer /etc/wazuh-indexer/opensearch-security/idp-metadata.xml

                chmod 640 /etc/wazuh-indexer/opensearch-security/idp-metadata.xml
idp.entity_id- if you followed this guide it iswazuh-saml- you can also see it in the metadata file
sp.entity_id- if you followed this guide this iswazuh-samlsp.kibana_url- your wazuh dashboard url - e.g.https://wazuh.mydomain.comorhttps://<IP_OF_YOUR_WAZUH_VMroles_key- this is the name you entered into the role mapping - if you followed this guide it is calledRolesand
exchange_key- copy it from the metadata file - you can find it between the<ds:X509Certificate>and</ds:X509Certificate>tags, usually starts withMII- dont forget the"around the key
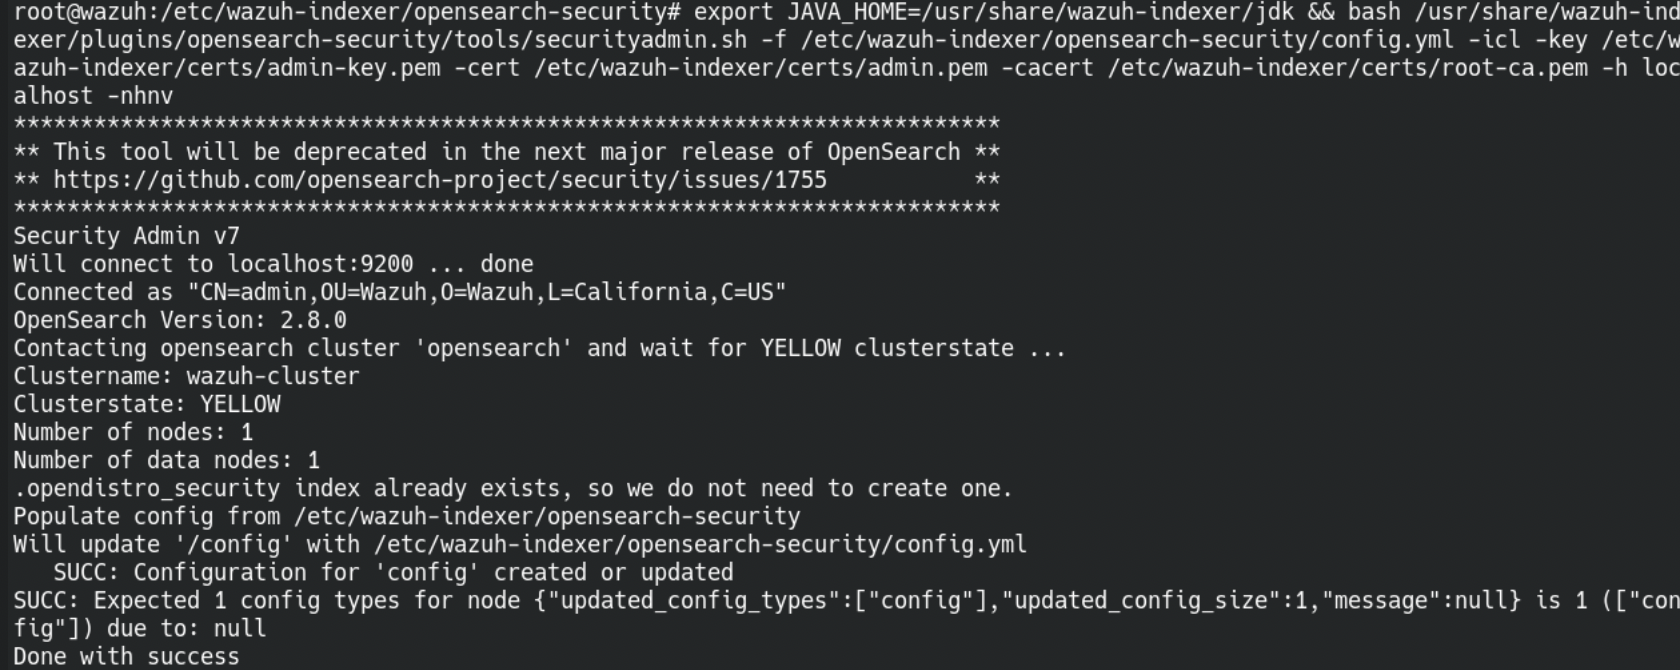
save the file and run the securityadmin.sh script from the following location:
export JAVA_HOME=/usr/share/wazuh-indexer/jdk/ && bash /usr/share/wazuh-indexer/plugins/opensearch-security/tools/securityadmin.sh -f /etc/wazuh-indexer/opensearch-security/config.yml -icl -key /etc/wazuh-indexer/certs/admin-key.pem -cert /etc/wazuh-indexer/certs/admin.pem -cacert /etc/wazuh-indexer/certs/root-ca.pem -h localhost -nhnv
if all is well, it should finish with Done with success like below
The next step is to adjust the /etc/wazuh-indexer/opensearch-security/roles_mapping.yml
open the file and scroll down until you see the following:
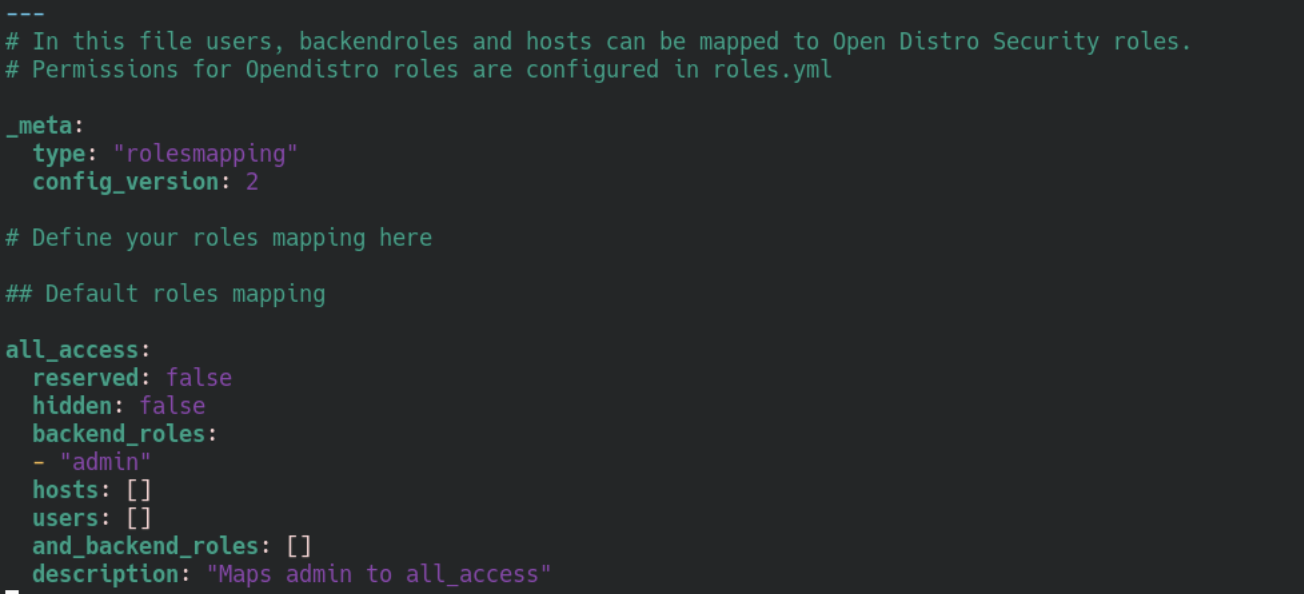
Now, remember the roles mapping you created earlier? In it you defined a group and the corresponding backend role that should be returned - if you followed this tutorial - it is wazuh-admin.
This role needs to be added to the roles_mapping.yml now like below:
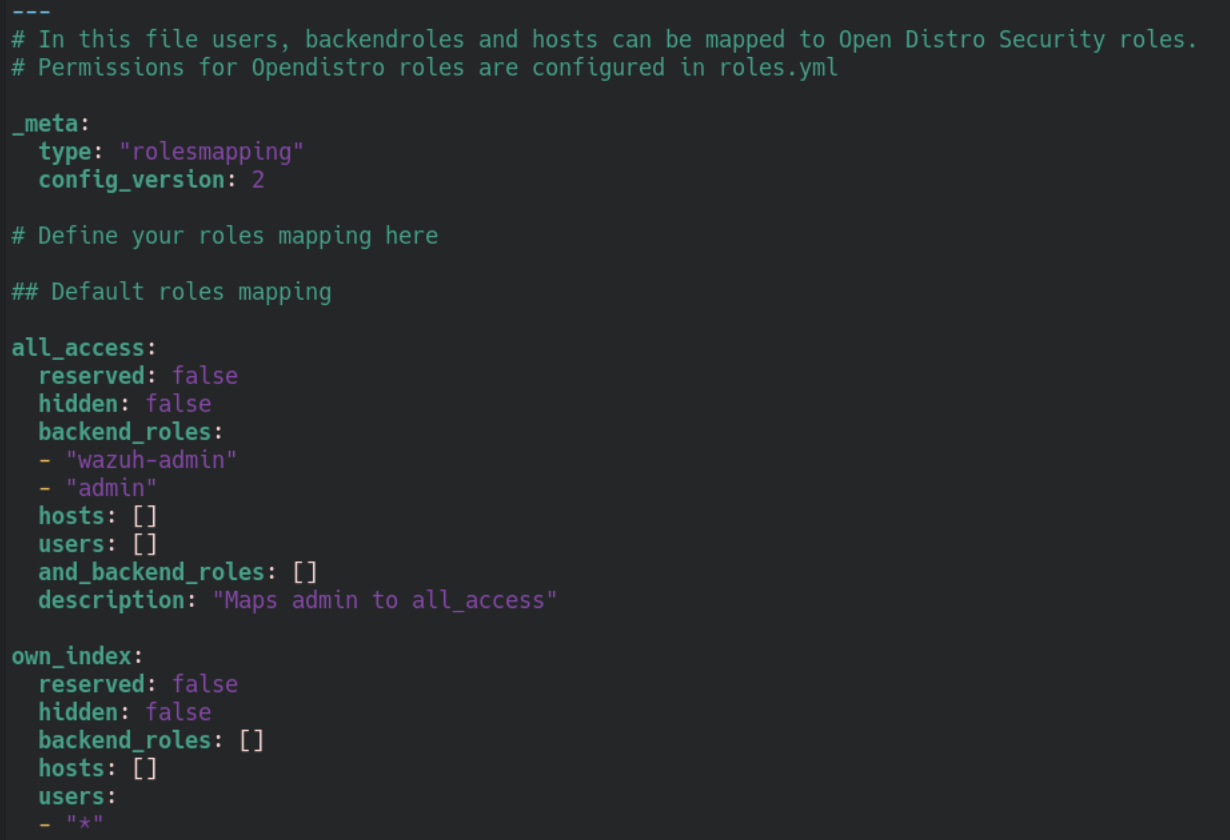
Save the file, and run the securityadmin.sh again but this time with the roles_mapping.yml as the changed file.
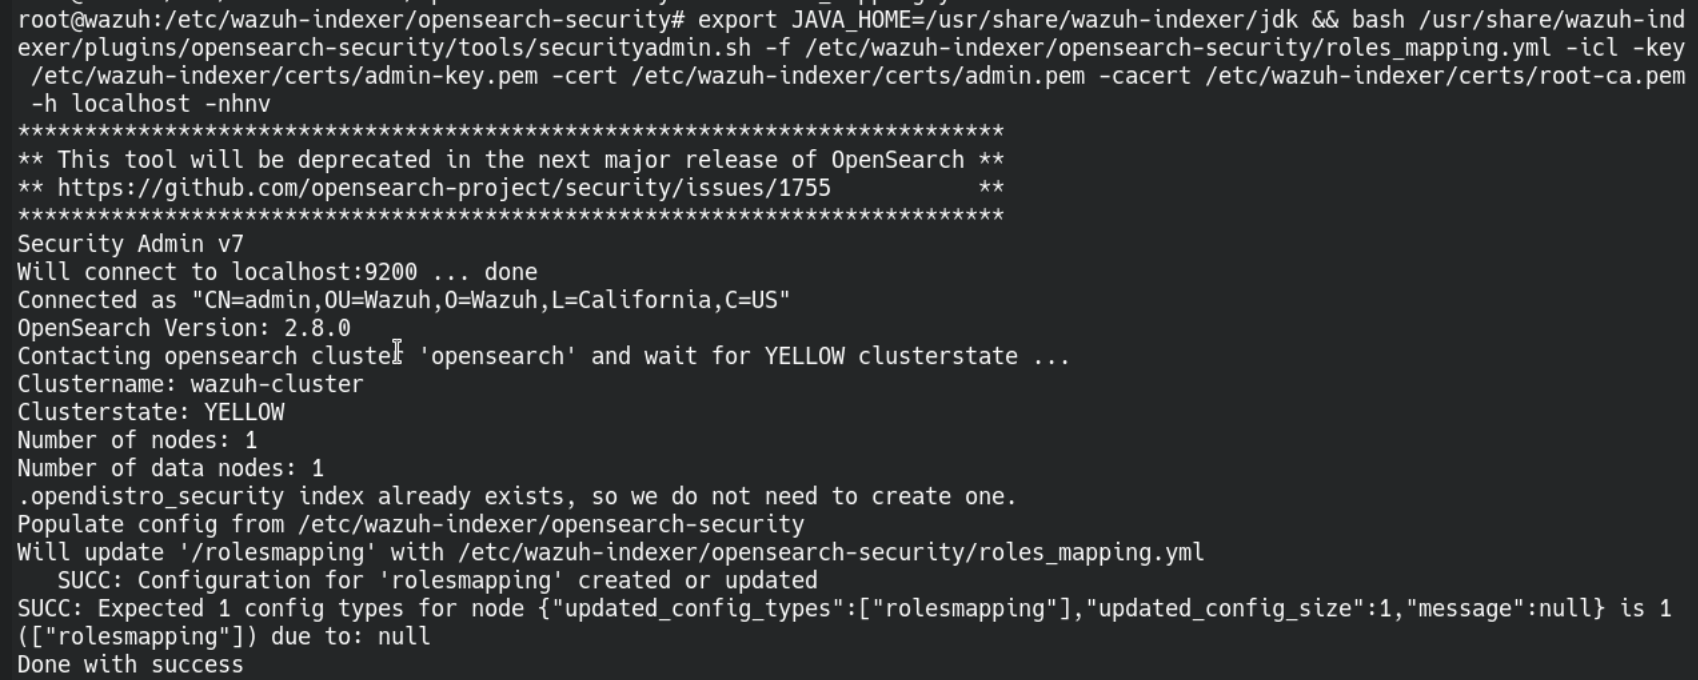
export JAVA_HOME=/usr/share/wazuh-indexer/jdk/ && bash /usr/share/wazuh-indexer/plugins/opensearch-security/tools/securityadmin.sh -f /etc/wazuh-indexer/opensearch-security/roles_mapping.yml -icl -key /etc/wazuh-indexer/certs/admin-key.pem -cert /etc/wazuh-indexer/certs/admin.pem -cacert /etc/wazuh-indexer/certs/root-ca.pem -h localhost -nhnv
once again, if all goes well it should return - Done with success
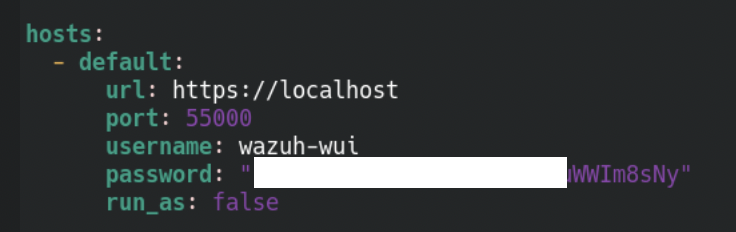
Now the last three steps - first we check /usr/share/wazuh-dashboard/data/wazuh/config/wazuh.yml
The line that interests us is the last one - run_as if that one is set to true we can change it to false.
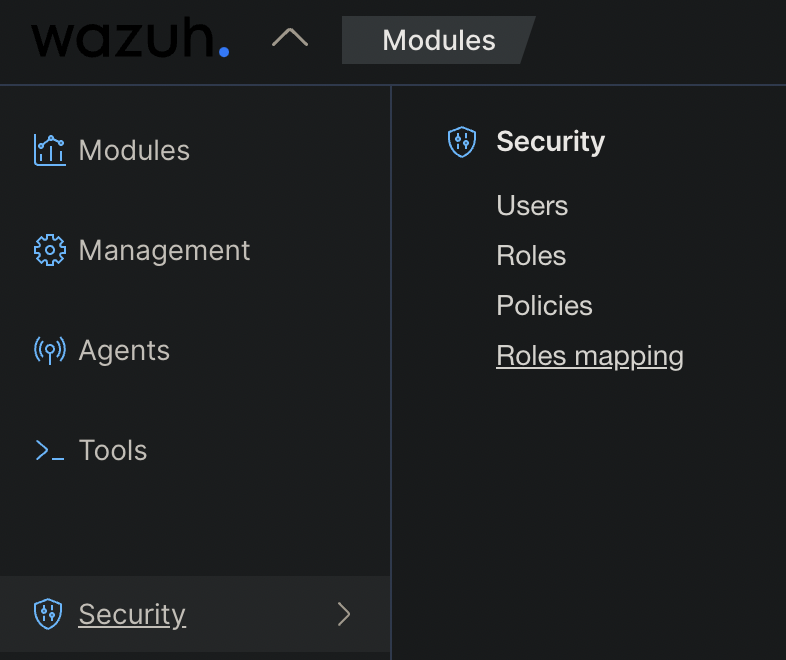
The penultimate task is to add a role to wazuh - open the dashboard - click on the arrow next to the wazuh logo then on Security and Roles mapping.
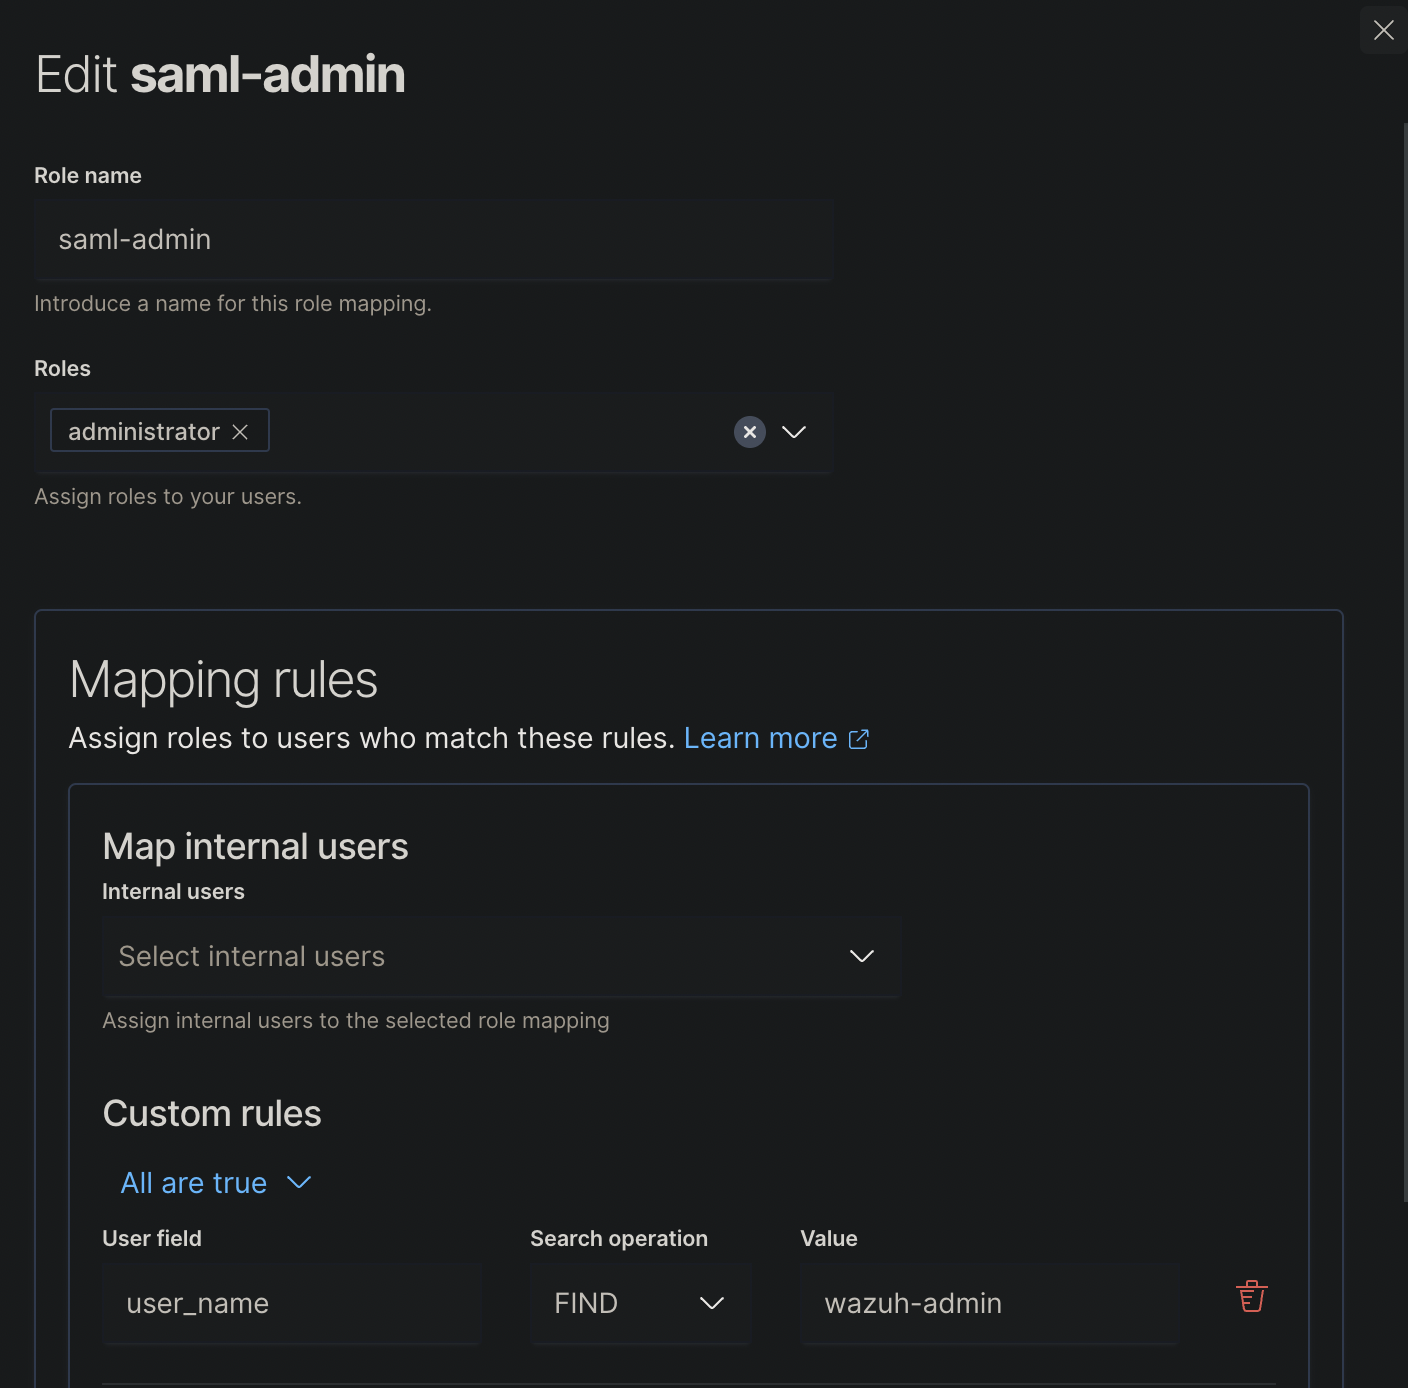
We will now add a new role mapping - give it any descriptive name add the respective Roles -> in this case administrator and add a new custom rule at the bottom that matches (FIND) the user_name to wazuh-admin.
Save the role mapping.
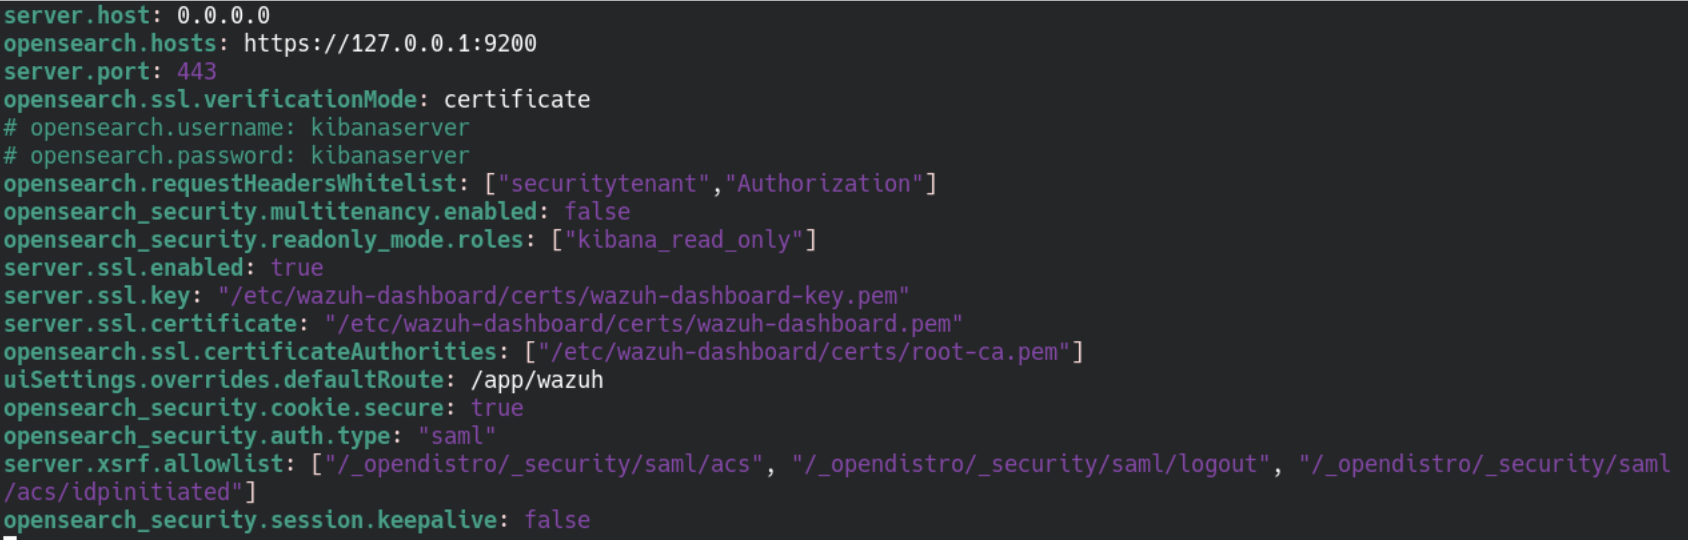
The last step is to add saml authentication to /etc/wazuh-dashboard/opensearch_dashboards.yml
Add the following lines to the file:
opensearch_security.auth.type: "saml"
server.xsrf.allowlist: ["/_opendistro/_security/saml/acs", "/_opendistro/_security/saml/logout", "/_opendistro/_security/saml/acs/idpinitiated"]
opensearch_security.session.keepalive: false
after the change, the file could look something like this:
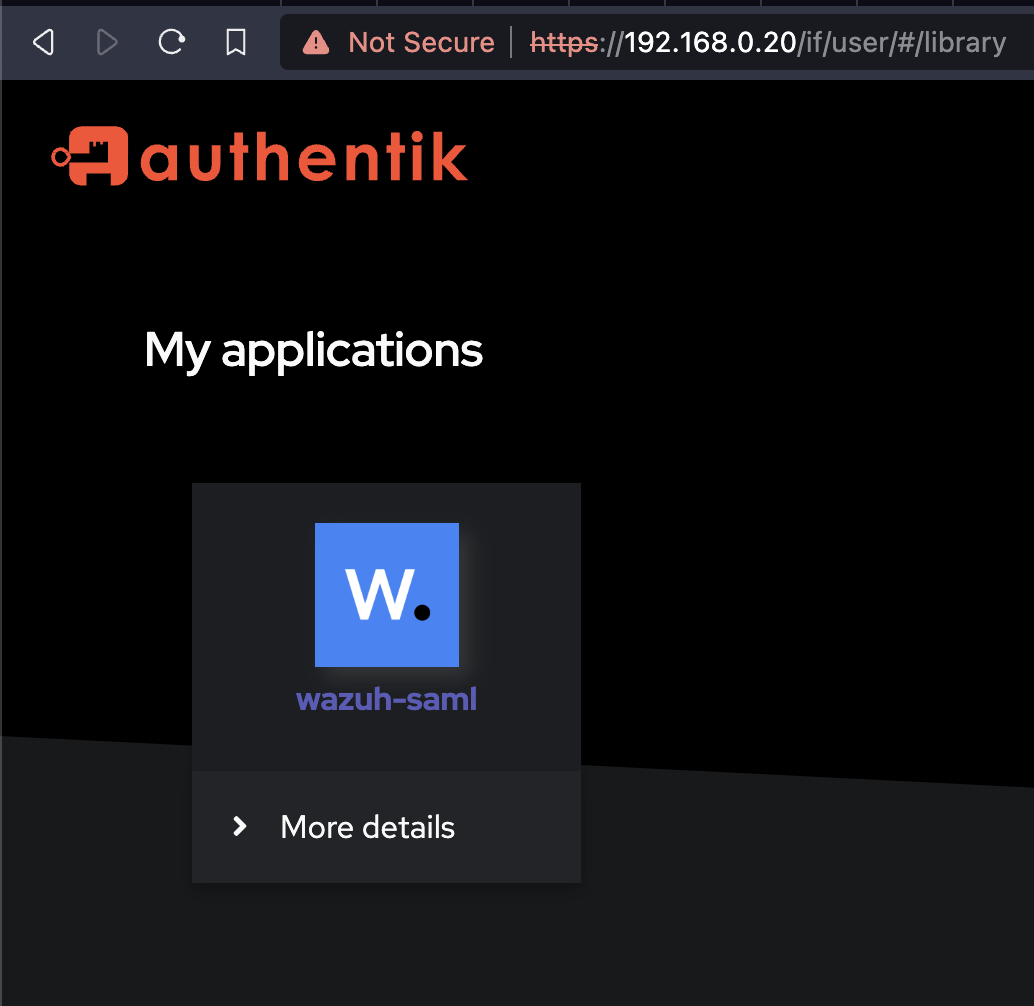
now restart the wazuh-dashboard service and when you visit the wazuh dashboard you will be greeted by the authentik login.
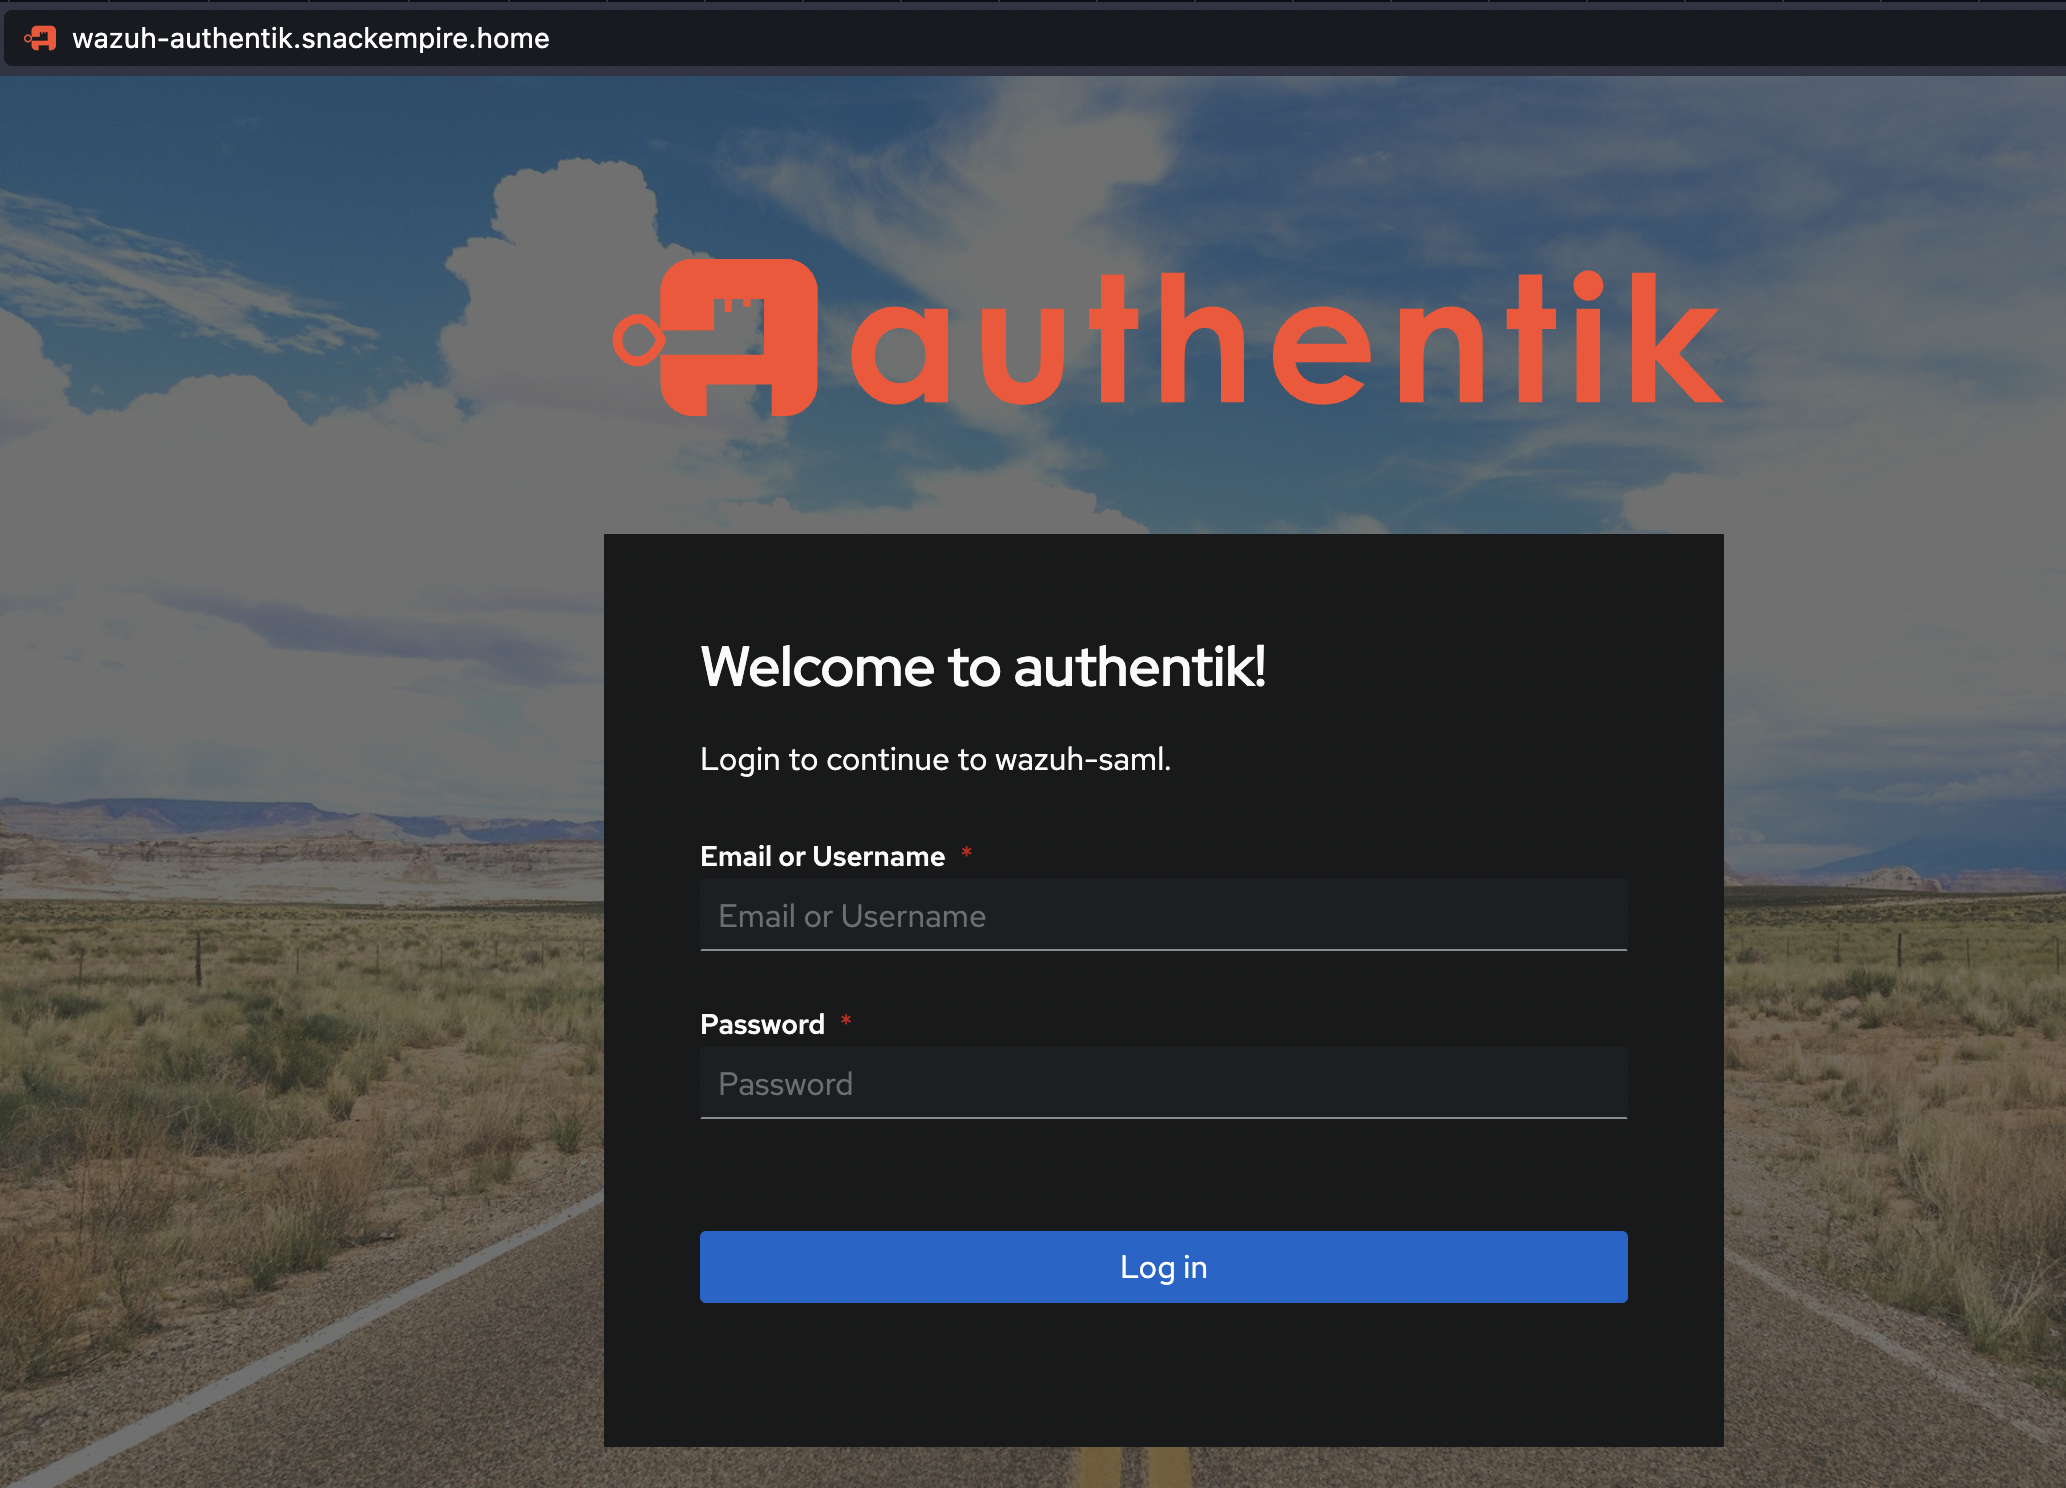
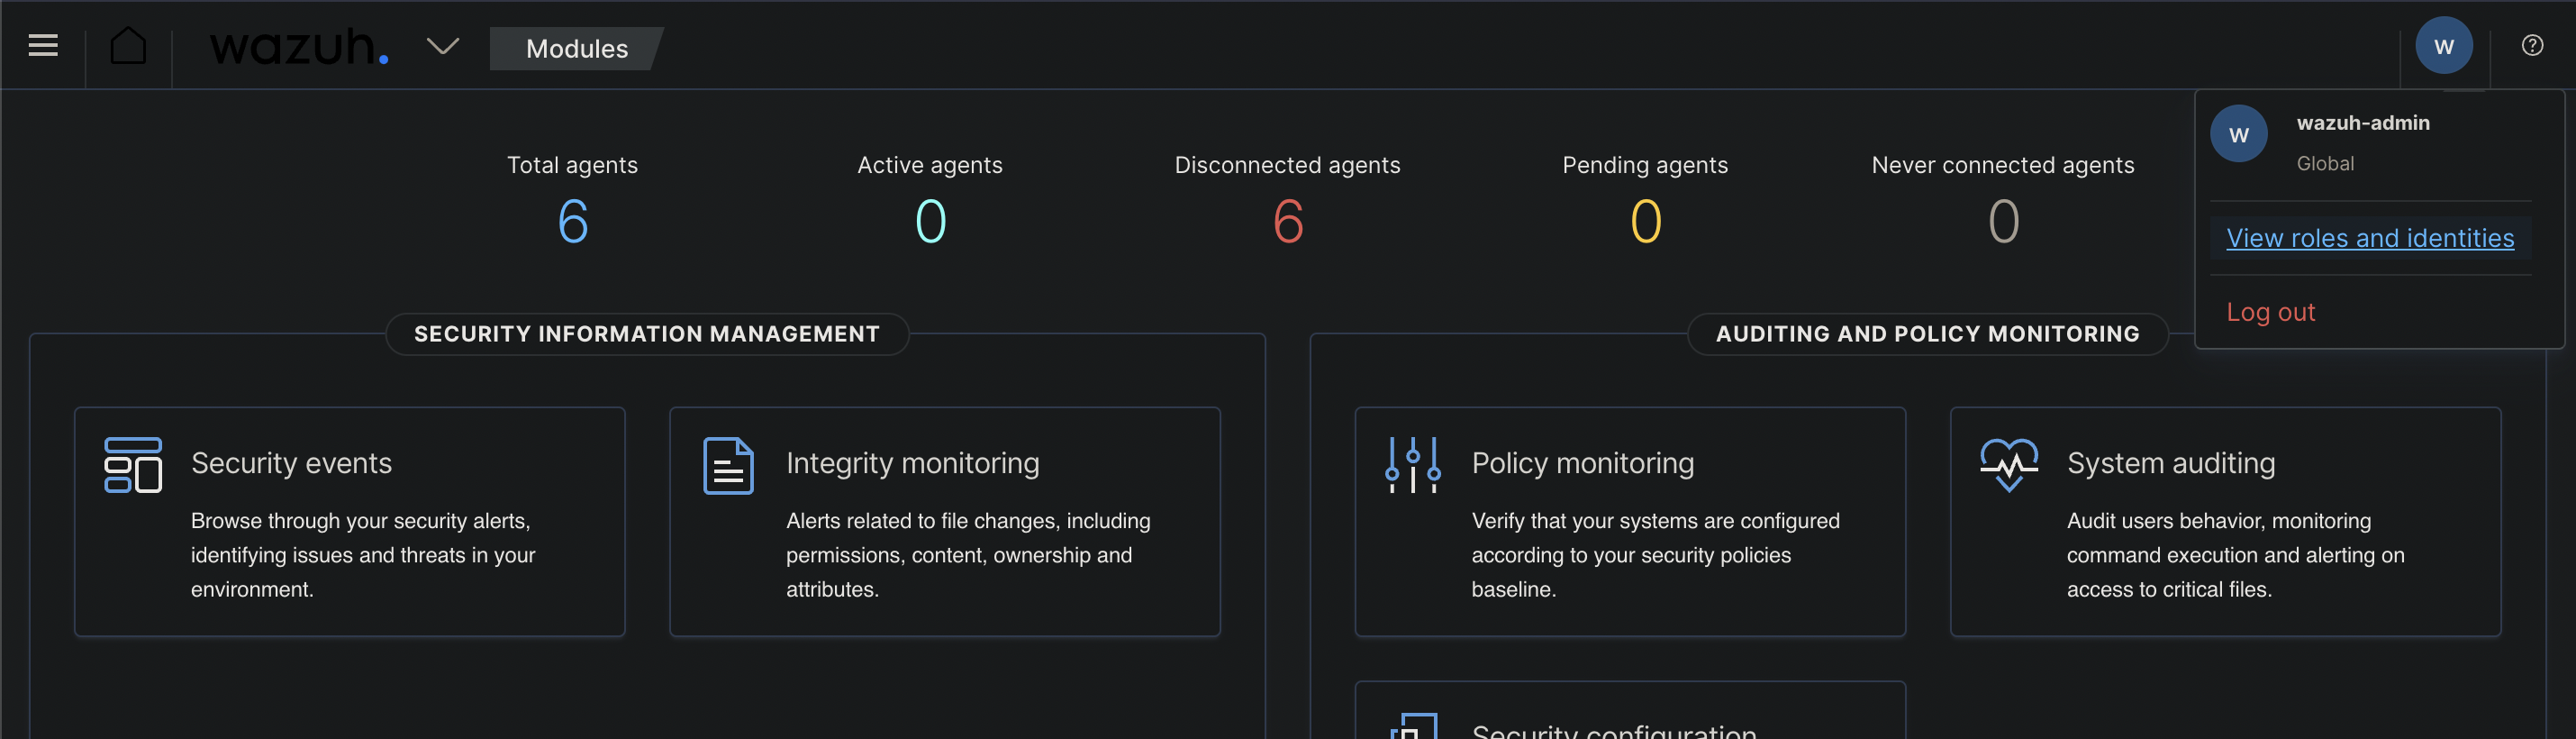
if you login as the wazuh-admin user you will be forwarded to wazuh as wazuh-admin 🎉🎉🎉
Thank you to Videothek for the brain teaser - this one took the better part of 4 weeks to figure out correctly because there was no documentation how to achieve this.
If you like this content - you can check out https://maikroservice.com/email for more content like this.